实战 | 基于OpenCV实现魔方颜色识别与色块排序
实战 | 基于OpenCV实现魔方颜色识别与色块排序

Color Space
发布于 2024-06-17 18:01:24
发布于 2024-06-17 18:01:24
视觉/图像重磅干货,第一时间送达!
检测需求
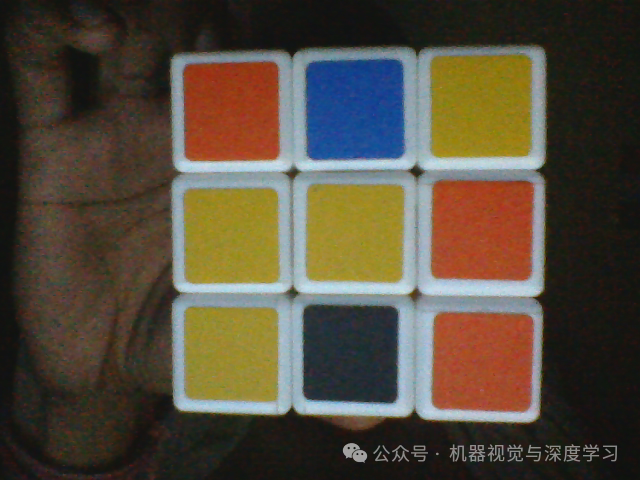
为了做自动魔方识别与复原项目,需要用图像处理的方法识别魔方每个色块的位置与颜色。相机拍摄的魔方单面图像如下:

实现步骤
本文主要使用OpenCV来实现魔方颜色识别与色块位置排序。
【1】颜色识别。设定每个色块在HSV颜色空间的范围来判断和提取颜色。
image = cv2.imread('1.png')
original = image.copy()
image = cv2.cvtColor(image, cv2.COLOR_BGR2HSV)
mask = np.zeros(image.shape, dtype=np.uint8)

colors = {
    'gray': ([76, 0, 41], [179, 255, 70]),        # Gray
    'blue': ([69, 120, 100], [179, 255, 255]),    # Blue
    'yellow': ([21, 110, 117], [45, 255, 255]),   # Yellow
    'orange': ([0, 110, 125], [17, 255, 255])     # Orange
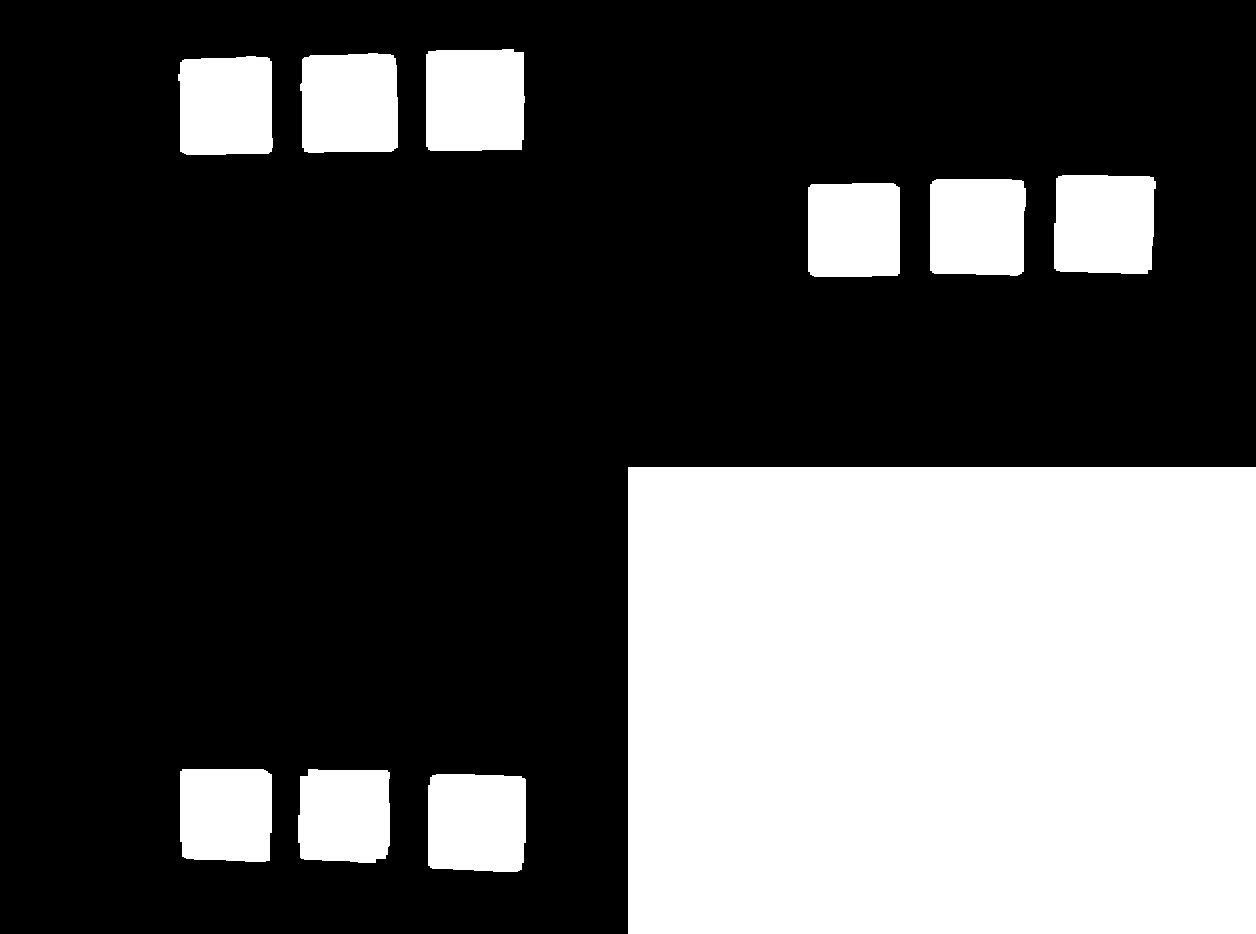
}【2】提取色块掩码。在步骤【1】的基础上添加形态学处理,然后通过或操作
(cv2.bitwise_or)将所有色块区域提取出来。# Color threshold to find the squares
open_kernel = cv2.getStructuringElement(cv2.MORPH_RECT, (7,7))
close_kernel = cv2.getStructuringElement(cv2.MORPH_RECT, (5,5))
for color, (lower, upper) in colors.items():
lower = np.array(lower, dtype=np.uint8)
upper = np.array(upper, dtype=np.uint8)
color_mask = cv2.inRange(image, lower, upper)
color_mask = cv2.morphologyEx(color_mask, cv2.MORPH_OPEN, open_kernel, iterations=1)
color_mask = cv2.morphologyEx(color_mask, cv2.MORPH_CLOSE, close_kernel, iterations=5)
color_mask = cv2.merge([color_mask, color_mask, color_mask])
mask = cv2.bitwise_or(mask, color_mask)【3】色块排序。排序使用imutils包的contours模块实现。
from imutils import contours 先做一次从上到下排序,再做一次从左到右排序即可:gray = cv2.cvtColor(mask, cv2.COLOR_BGR2GRAY)
cnts = cv2.findContours(gray, cv2.RETR_EXTERNAL, cv2.CHAIN_APPROX_SIMPLE)
cnts = cnts[0] if len(cnts) == 2 else cnts[1]
# Sort all contours from top-to-bottom or bottom-to-top
(cnts, _) = contours.sort_contours(cnts, method="top-to-bottom")
# Take each row of 3 and sort from left-to-right or right-to-left
cube_rows = []
row = []
for (i, c) in enumerate(cnts, 1):
row.append(c)
if i % 3 == 0:
(cnts, _) = contours.sort_contours(row, method="left-to-right")
cube_rows.append(cnts)
row = []
# Draw text
number = 0
for row in cube_rows:
for c in row:
x,y,w,h = cv2.boundingRect(c)
cv2.rectangle(original, (x, y), (x + w, y + h), (36,255,12), 2)
cv2.putText(original, "#{}".format(number + 1), (x,y - 5), cv2.FONT_HERSHEY_SIMPLEX, 0.7, (255,255,255), 2)
number += 1
当然,还可以从下到上,从右向左排序。只需要设置下面的method即可:(cnts, _) = contours.sort_contours(cnts, method="top-to-bottom")
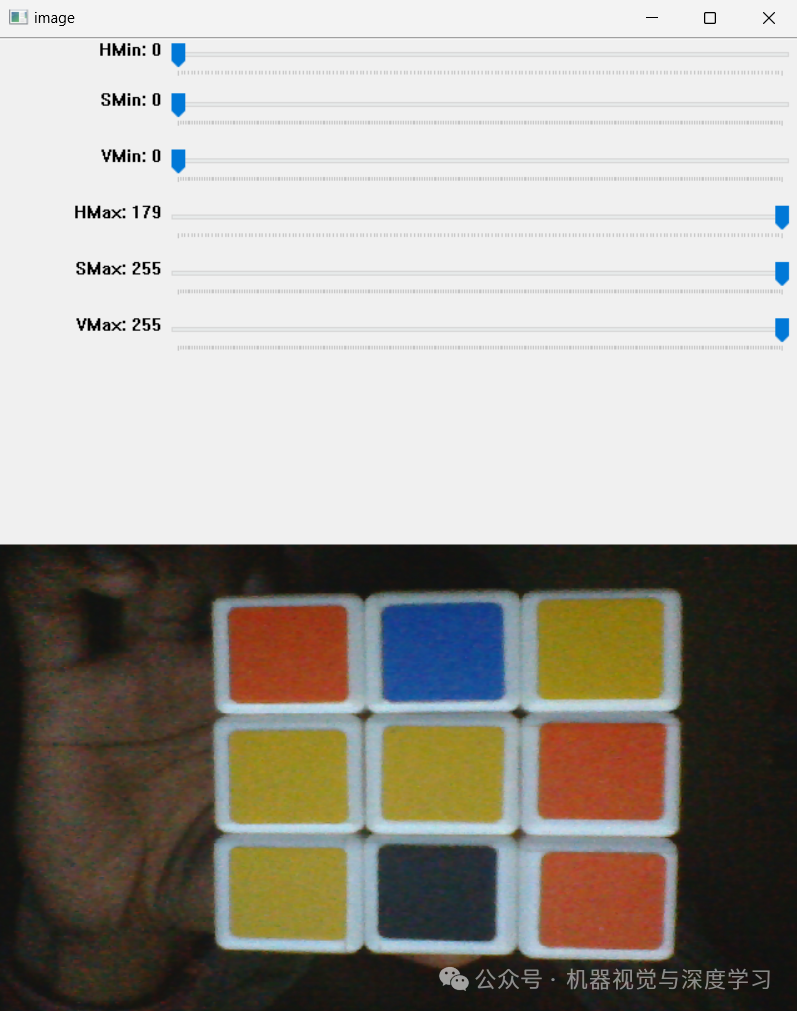
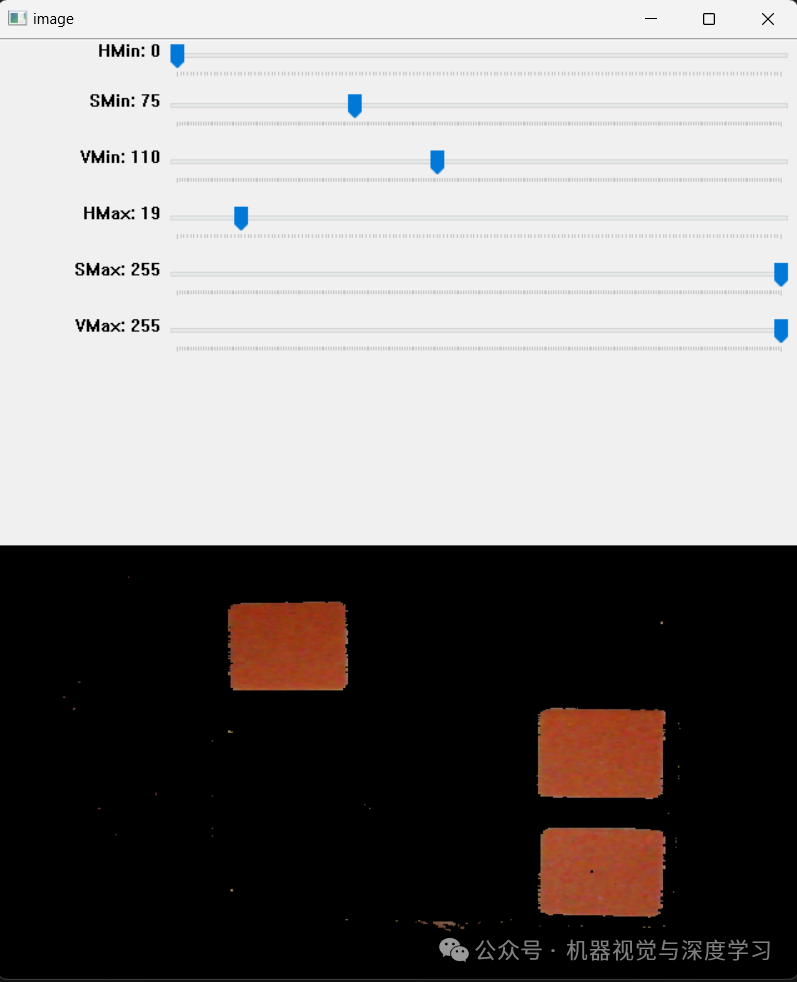
(cnts, _) = contours.sort_contours(row, method="left-to-right") 【4】如何获取HSV范围。可以使用下面代码,通过滑动条动态调整的方法获取:import cv2
import numpy as np
def nothing(x):
pass
# Load image
image = cv2.imread('1.jpg')
# Create a window
cv2.namedWindow('image')
# Create trackbars for color change
# Hue is from 0-179 for Opencv
cv2.createTrackbar('HMin', 'image', 0, 179, nothing)
cv2.createTrackbar('SMin', 'image', 0, 255, nothing)
cv2.createTrackbar('VMin', 'image', 0, 255, nothing)
cv2.createTrackbar('HMax', 'image', 0, 179, nothing)
cv2.createTrackbar('SMax', 'image', 0, 255, nothing)
cv2.createTrackbar('VMax', 'image', 0, 255, nothing)
# Set default value for Max HSV trackbars
cv2.setTrackbarPos('HMax', 'image', 179)
cv2.setTrackbarPos('SMax', 'image', 255)
cv2.setTrackbarPos('VMax', 'image', 255)
# Initialize HSV min/max values
hMin = sMin = vMin = hMax = sMax = vMax = 0
phMin = psMin = pvMin = phMax = psMax = pvMax = 0
while(1):
# Get current positions of all trackbars
hMin = cv2.getTrackbarPos('HMin', 'image')
sMin = cv2.getTrackbarPos('SMin', 'image')
vMin = cv2.getTrackbarPos('VMin', 'image')
hMax = cv2.getTrackbarPos('HMax', 'image')
sMax = cv2.getTrackbarPos('SMax', 'image')
vMax = cv2.getTrackbarPos('VMax', 'image')
# Set minimum and maximum HSV values to display
lower = np.array([hMin, sMin, vMin])
upper = np.array([hMax, sMax, vMax])
# Convert to HSV format and color threshold
hsv = cv2.cvtColor(image, cv2.COLOR_BGR2HSV)
mask = cv2.inRange(hsv, lower, upper)
result = cv2.bitwise_and(image, image, mask=mask)
# Print if there is a change in HSV value
if((phMin != hMin) | (psMin != sMin) | (pvMin != vMin) | (phMax != hMax) | (psMax != sMax) | (pvMax != vMax) ):
print("(hMin = %d , sMin = %d, vMin = %d), (hMax = %d , sMax = %d, vMax = %d)" % (hMin , sMin , vMin, hMax, sMax , vMax))
phMin = hMin
psMin = sMin
pvMin = vMin
phMax = hMax
psMax = sMax
pvMax = vMax
# Display result image
cv2.imshow('image', result)
if cv2.waitKey(10) & 0xFF == ord('q'):
break
cv2.destroyAllWindows()

—THE END—
本文参与 腾讯云自媒体同步曝光计划,分享自微信公众号。
原始发表:2024-06-16,如有侵权请联系 cloudcommunity@tencent.com 删除
本文分享自 OpenCV与AI深度学习 微信公众号,前往查看
如有侵权,请联系 cloudcommunity@tencent.com 删除。
本文参与 腾讯云自媒体同步曝光计划 ,欢迎热爱写作的你一起参与!
评论
登录后参与评论
推荐阅读
目录

