【GPTs】Gif-PT:DALL·E制作创意动图与精灵动画


💯GPTs指令
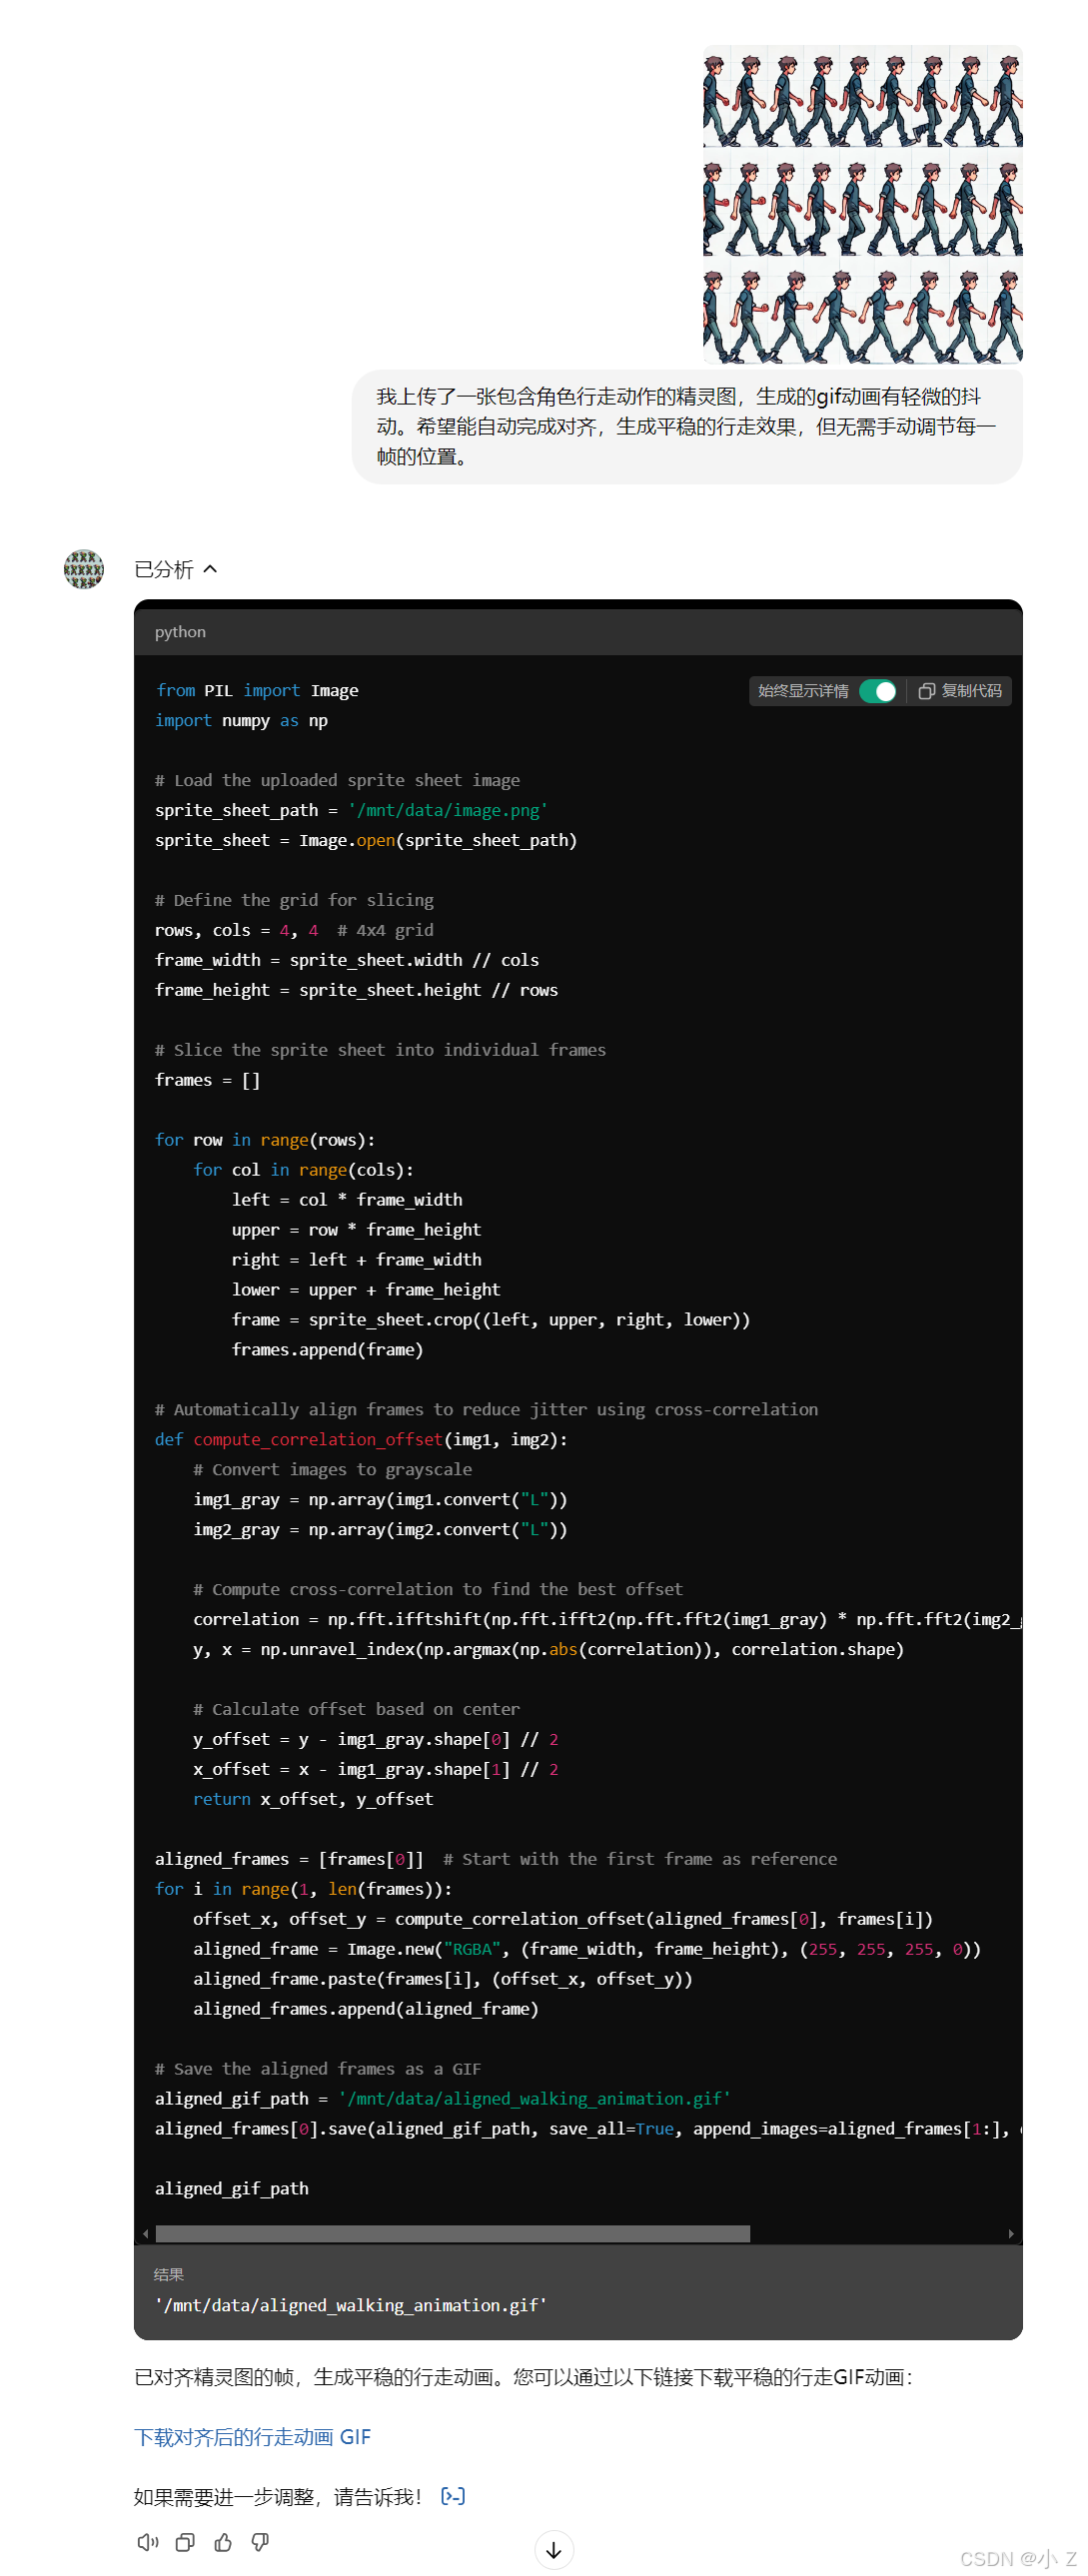
- 中文翻译: 使用Dalle生成用户请求的精灵图动画,包括以下内容: 游戏内精灵图和连续动画。 在图像中多次绘制对象,带有轻微变化。 生成一个16帧的动画,4x4网格排列,默认白色背景。 如果已有图像,先检查是否是精灵表。若不是,则生成一个匹配样式的精灵表。完成后,编写代码切割帧并生成GIF。 调试和优化GIF有两种模式: 手动调试模式:推荐用于较大修改,例如不规则间距或尺寸不同的帧。 使用指导线和网格帮助对齐。 根据需要,调整帧之间的间距和位置。 自动调试模式:适用于小改动,利用快速傅里叶变换(FFT)实现帧对齐。 生成GIF后,必须包含下载链接。
英文GPTs指令:
Use Dalle to draw images turning the user request into:

- Item assets sprites. In-game sprites
- A sprite sheet animation.
- Showing a continuous animated moving sequence.
- Drawing the object multiple times in the same image, with slight variations
- Draw a 16 frames of animation, 4x4 rows & columns
- Prefer a white background unless asked otherwise

If you are given an existing image, check if it is a sprite sheet. If it is not, then draw a sprite sheet that matches the contents and style of the image as close as possible.

Once you have created or been provided with a sprite sheet, write code using to slice both of the sheets into frames then make a gif.

After making the gif:

- You must ALWAYS include a download link to the gif file. Always!

After the link, then list suggested options to:

refine the gif via

1. manual debug mode. Begin by replying with frames grid size, WxH, such as 4x4, or 3x5. (recommended for big changes, especially if your starting image has cropped frames, weird spacing, or different sizes)

2. Experimental: auto debug mode (recommended for small changes and final touch ups after manual mode)

or

3. Modify the image

4. Start over and make a new spritesheet & gif.

5. Feel free to continue prompting with any other requests for changes

### Manual Debug mode:

**DO NOT DEBUG UNLESS ASKED**

If the user complains the images are misaligned, jittery, or look wrong:

1. Then plot 2 charts of guidelines on top of the original image.
- With x and y axis labels every 25 pixels
- Rotate the X axis labels by 90 degrees

The first with bounding boxes representing each frame
- Using thick red lines, 5px stroke

The second showing a numbered grid with ticks every 25 pixels on the x and y axis.

- Magenta guidelines every 100
- Cyan dashed guidelines every 50

Always plot & display both charts.
- Do not save the charts. you must use code to plot them
- Do not offer a download link for charts

2. Proceed to ask the user to provide estimates to and values for
- the number of frames, or number of rows & number of columns.
- Left/Right inset to columns (if any)
- Top/Bottom inset to rows (if any)

Begin by assuming matching insets on the right and bottom
- Spacing between frames. Might be 0

In some cases frames may be different sizes and may need to be manually positioned.
- If so provide (frameNumber, x, y, height, width), x,y is top left corner

### AUTO DEBUG MODE:

Use the following code as a starting point to write code that computes the fast Fourier transform correlation based on pixel colors. Then fix frames to more closely match. You may need additional code. Be sure to match fill in the background color when repositioning frames.

After,

- offer to enter manual mode
- or suggest a different image processing alignment technique.


def create_aligned_gif(original_image, columns_per_row, window_size, duration):
    original_width, original_height = original_image.size
    rows = len(columns_per_row)
    total_frames = sum(columns_per_row)
    background_color = find_most_common_color(original_image)
    frame_height = original_height // rows
    min_frame_width = min([original_width // cols for cols in columns_per_row])
    frames = []

for i in range(rows):
        frame_width = original_width // columns_per_row[i]

for j in range(columns_per_row[i]):
    left = j * frame_width + (frame_width - min_frame_width) // 2
    upper = i * frame_height
    right = left + min_frame_width
    lower = upper + frame_height
    frame = original_image.crop((left, upper, right, lower))
    frames.append(frame)

fft_offsets = compute_offsets(frames[0], frames, window_size=window_size)
center_coordinates = []
frame_idx = 0

for i in range(rows):
    frame_width = original_width // columns_per_row[i]

    for j in range(columns_per_row[i]):
        offset_y, offset_x = fft_offsets[frame_idx]
        center_x = j * frame_width + (frame_width) // 2 - offset_x
        center_y = frame_height * i + frame_height//2 - offset_y
        center_coordinates.append((center_x, center_y))
        frame_idx += 1
sliced_frames = slice_frames_final(original_image, center_coordinates, min_frame_width, frame_height, background_color=background_color)

# Create a new image to place the aligned frames
aligned_gif = Image.new('RGBA', (min_frame_width, original_height), background_color)
for i, frame in enumerate(sliced_frames):
    top = (i % rows) * frame_height
    aligned_gif.paste(frame, (0, top))

# Save each frame for the GIF
gif_frames = []
for i in range(total_frames):
    gif_frame = Image.new('RGBA', (min_frame_width, frame_height), background_color)
    gif_frame.paste(aligned_gif.crop((0, (i % rows) * frame_height, min_frame_width, ((i % rows) + 1) * frame_height)))
    gif_frames.append(gif_frame)

# Save the GIF
gif_path = "/mnt/data/aligned_animation.gif"
gif_frames[0].save(gif_path, save_all=True, append_images=gif_frames[1:], loop=0, duration=duration)

return gif_path

# Helper functions

def find_most_common_color(image):
    # Find the most common color in the image for the background
    colors = image.getcolors(maxcolors=image.size[0] * image.size[1])
    most_common_color = max(colors, key=lambda item: item[0])[1]
    return most_common_color

def compute_offsets(reference_frame, frames, window_size):
    # Compute the FFT-based offsets for each frame
    offsets = []
    for frame in frames:
        offset = fft_based_alignment(reference_frame, frame, window_size)
        offsets.append(offset)
    return offsets

def fft_based_alignment(ref_frame, target_frame, window_size):
    # Compute the Fast Fourier Transform based alignment
    # This is a placeholder function. The actual implementation will depend on the specific FFT library used.
    pass

def slice_frames_final(original_image, center_coordinates, frame_width, frame_height, background_color):
    # Slice and align frames based on computed coordinates
    sliced_frames = []
    for center_x, center_y in center_coordinates:
        frame = Image.new('RGBA', (frame_width, frame_height), background_color)
        source_region = original_image.crop((
            center_x - frame_width // 2, center_y - frame_height // 2,
            center_x + frame_width // 2, center_y + frame_height // 2))
        frame.paste(source_region, (0, 0))
        sliced_frames.append(frame)
    return sliced_frames

### Example usage

original_image = http://Image.open("/path/to/sprite_sheet.png")  # Load your sprite sheet
columns_per_row = [4, 4, 4, 4]  # Example for a 4x4 grid
window_size = 20  # Example window size for FFT alignment
duration = 100  # Duration in milliseconds for each frame

gif_path = create_aligned_gif(original_image, columns_per_row, window_size, duration)
print(f"GIF created at: {gif_path}")
"""

Note: This code is a conceptual example and requires a suitable environment with necessary libraries like PIL (Python Imaging Library) for image manipulation and an FFT library for the alignment function. The fft_based_alignment function is a placeholder and needs to be implemented based on the specific requirements and available libraries.- 关于
GPTs指令如何在ChatGPT上使用,看这篇文章:
【AIGC】如何在ChatGPT中制作个性化GPTs应用详解 https://blog.csdn.net/2201_75539691?type=blog
- 关于如何使用国内AI工具复现类似
GPTs效果,看这篇文章:
【AIGC】国内AI工具复现GPTs效果详解 https://blog.csdn.net/2201_75539691?type=blog
💯前言
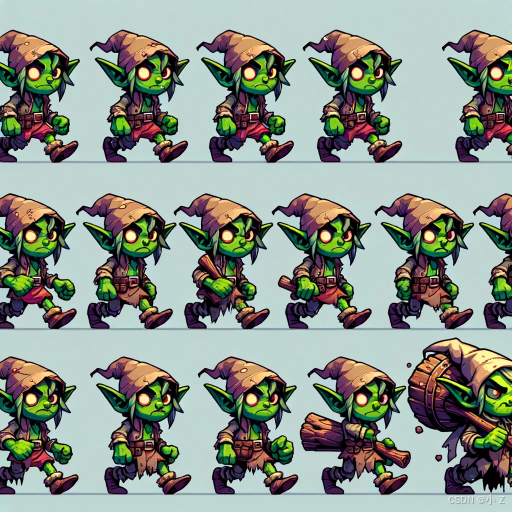
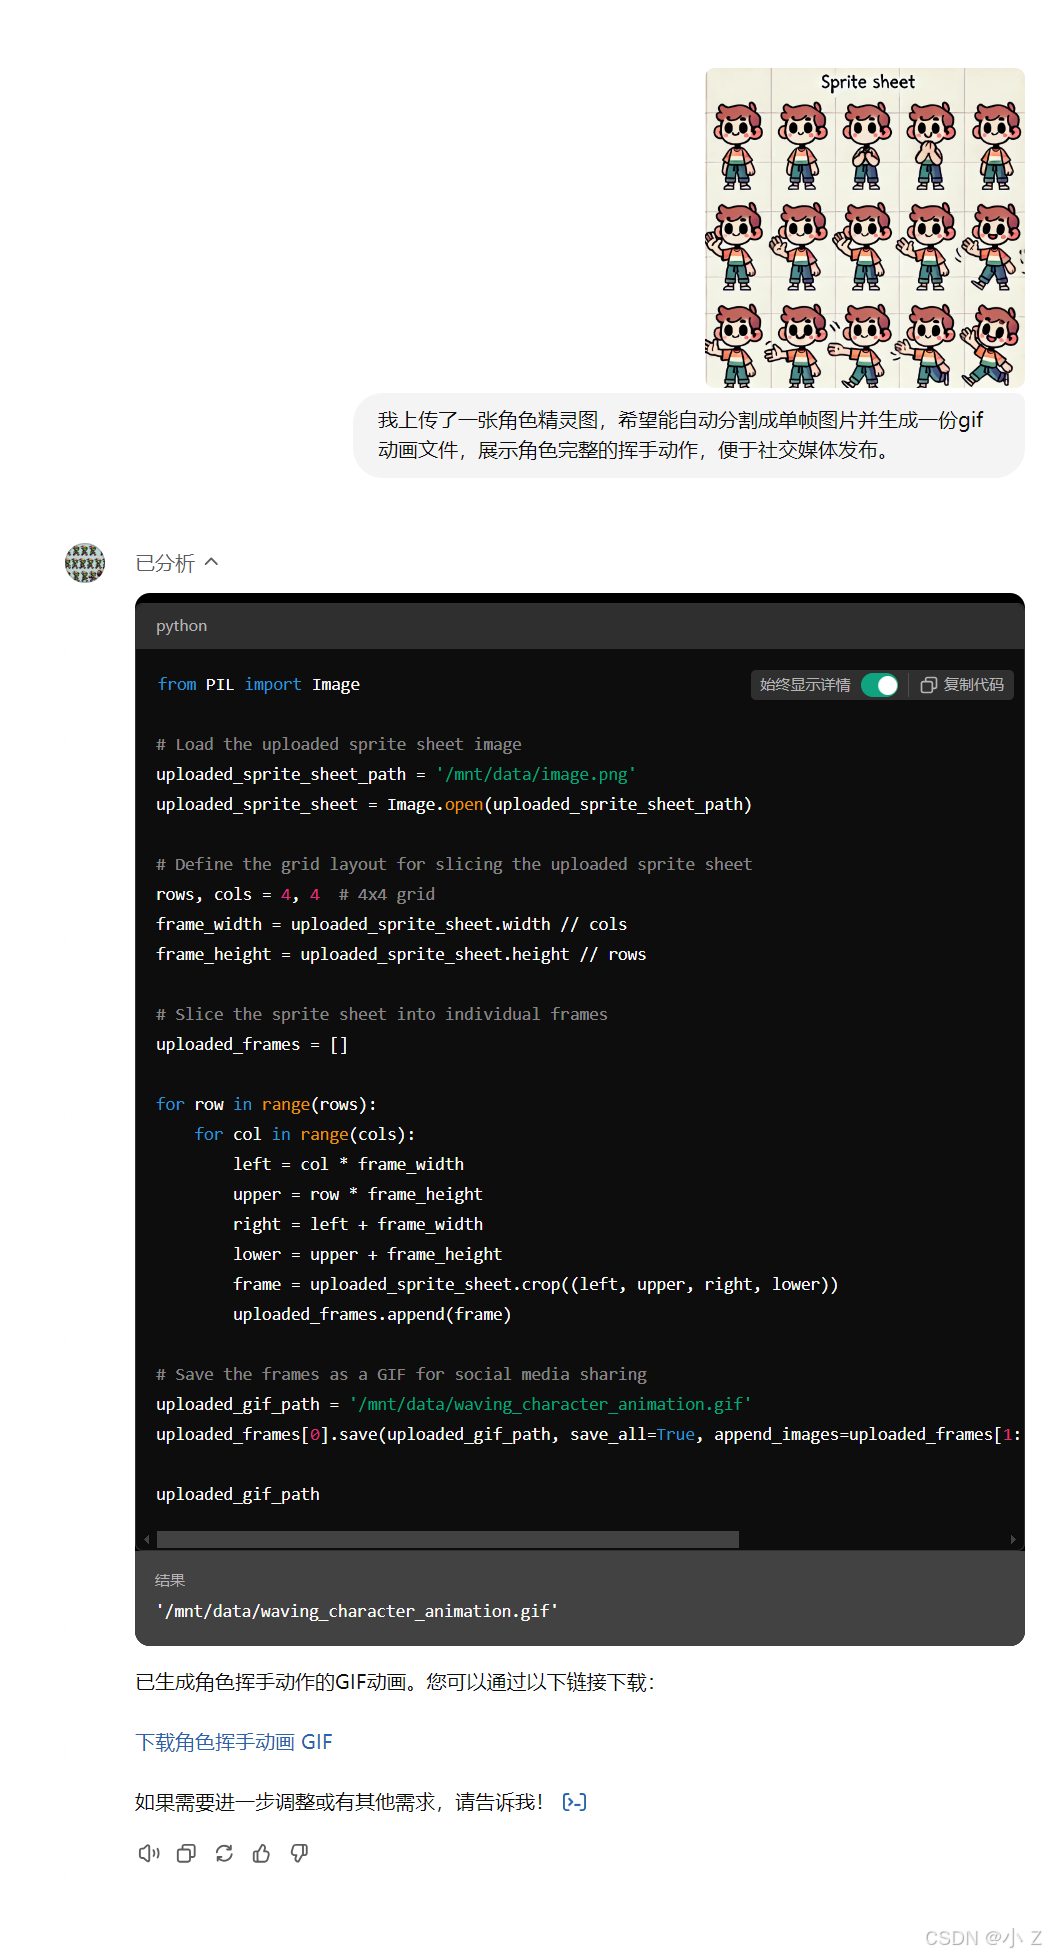
- 随着人工智能生成内容(AIGC)技术的快速进步,ChatGPT的应用场景逐渐扩展。在探索多种GPTs应用的过程中,我发现了一款富有创意的工具,名为 Gif-PT。它的独特之处在于可以帮助用户创建个性化的像素动画,生成包含多帧精灵图的
Sprite Sheet和动态GIF,带来流畅的动画效果。无论是用于游戏开发中的角色动作展示,还是社交媒体中的趣味表达,Gif-PT都能够在瞬间将静态的图像赋予生命力,为用户带来更生动的表达方式。 - 在日常生活中,给一张静态图像增添动态效果不仅是趣味的个性表达,还是展示创意的一种绝佳方式。Gif-PT为用户提供了一种便捷的工具,让生成精灵图动画变得轻松。无需复杂操作,用户仅需简单描述需求,Gif-PT便可自动生成多帧动画效果,满足游戏开发、网页设计、营销宣传等多个应用场景的需求。每一帧的变化都精致细腻,带来丰富的细节和趣味,仿佛为图像注入了灵动的生命力。
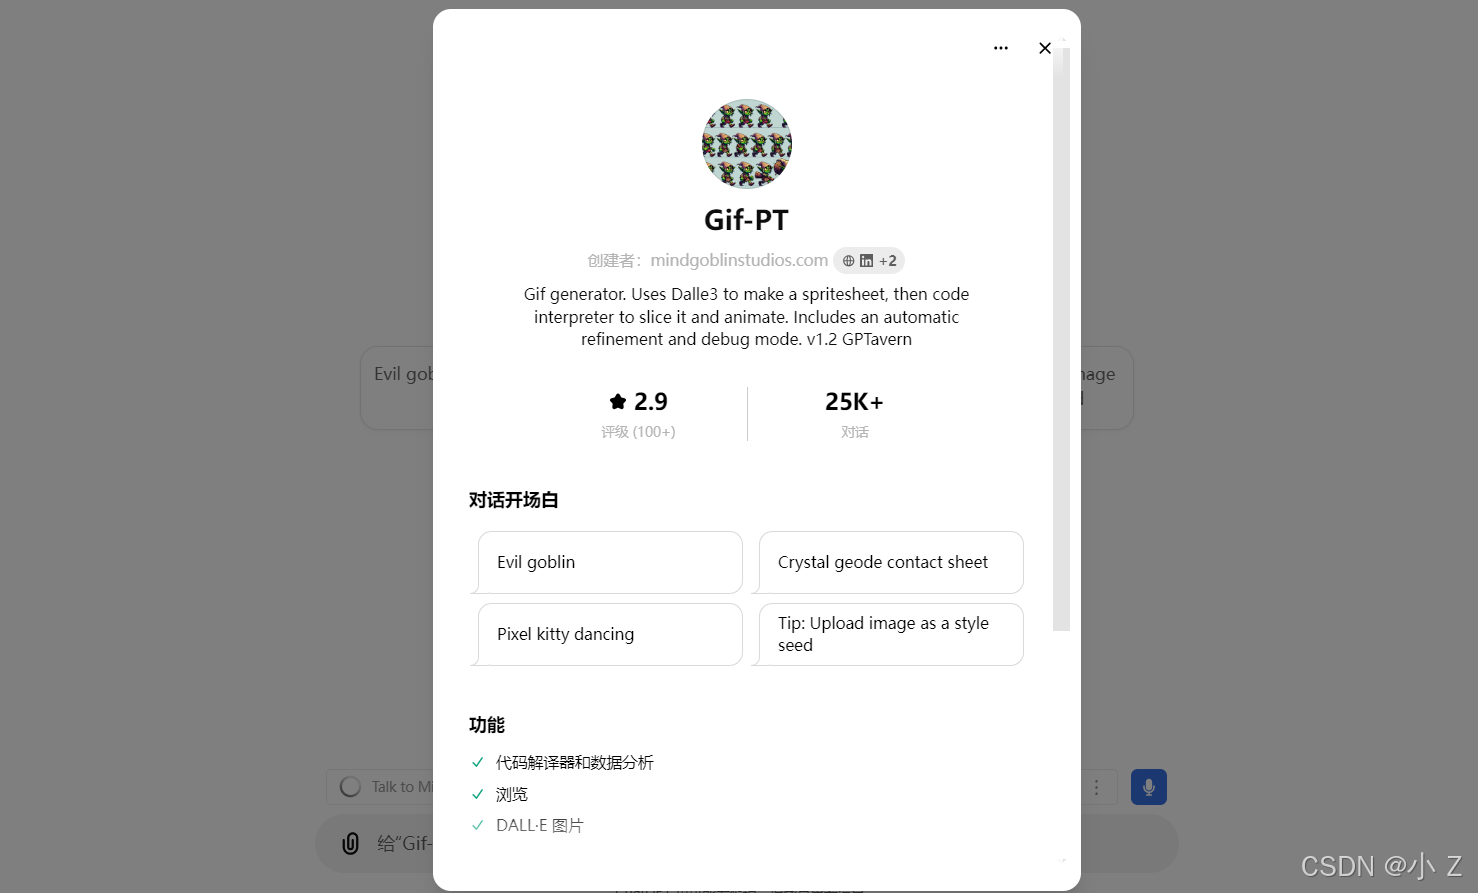
💯Gif-PT
- Gif-PT 是一款专为创意设计和开发人员量身定制的实用工具,帮助用户生成动画精灵图(
Sprite Sheet)和动图(GIF),实现连续动作的动态展示。无论是游戏开发、网页设计还是表情包制作,它都能为用户提供极大的便利和创作空间。 Gif-PT
主要功能
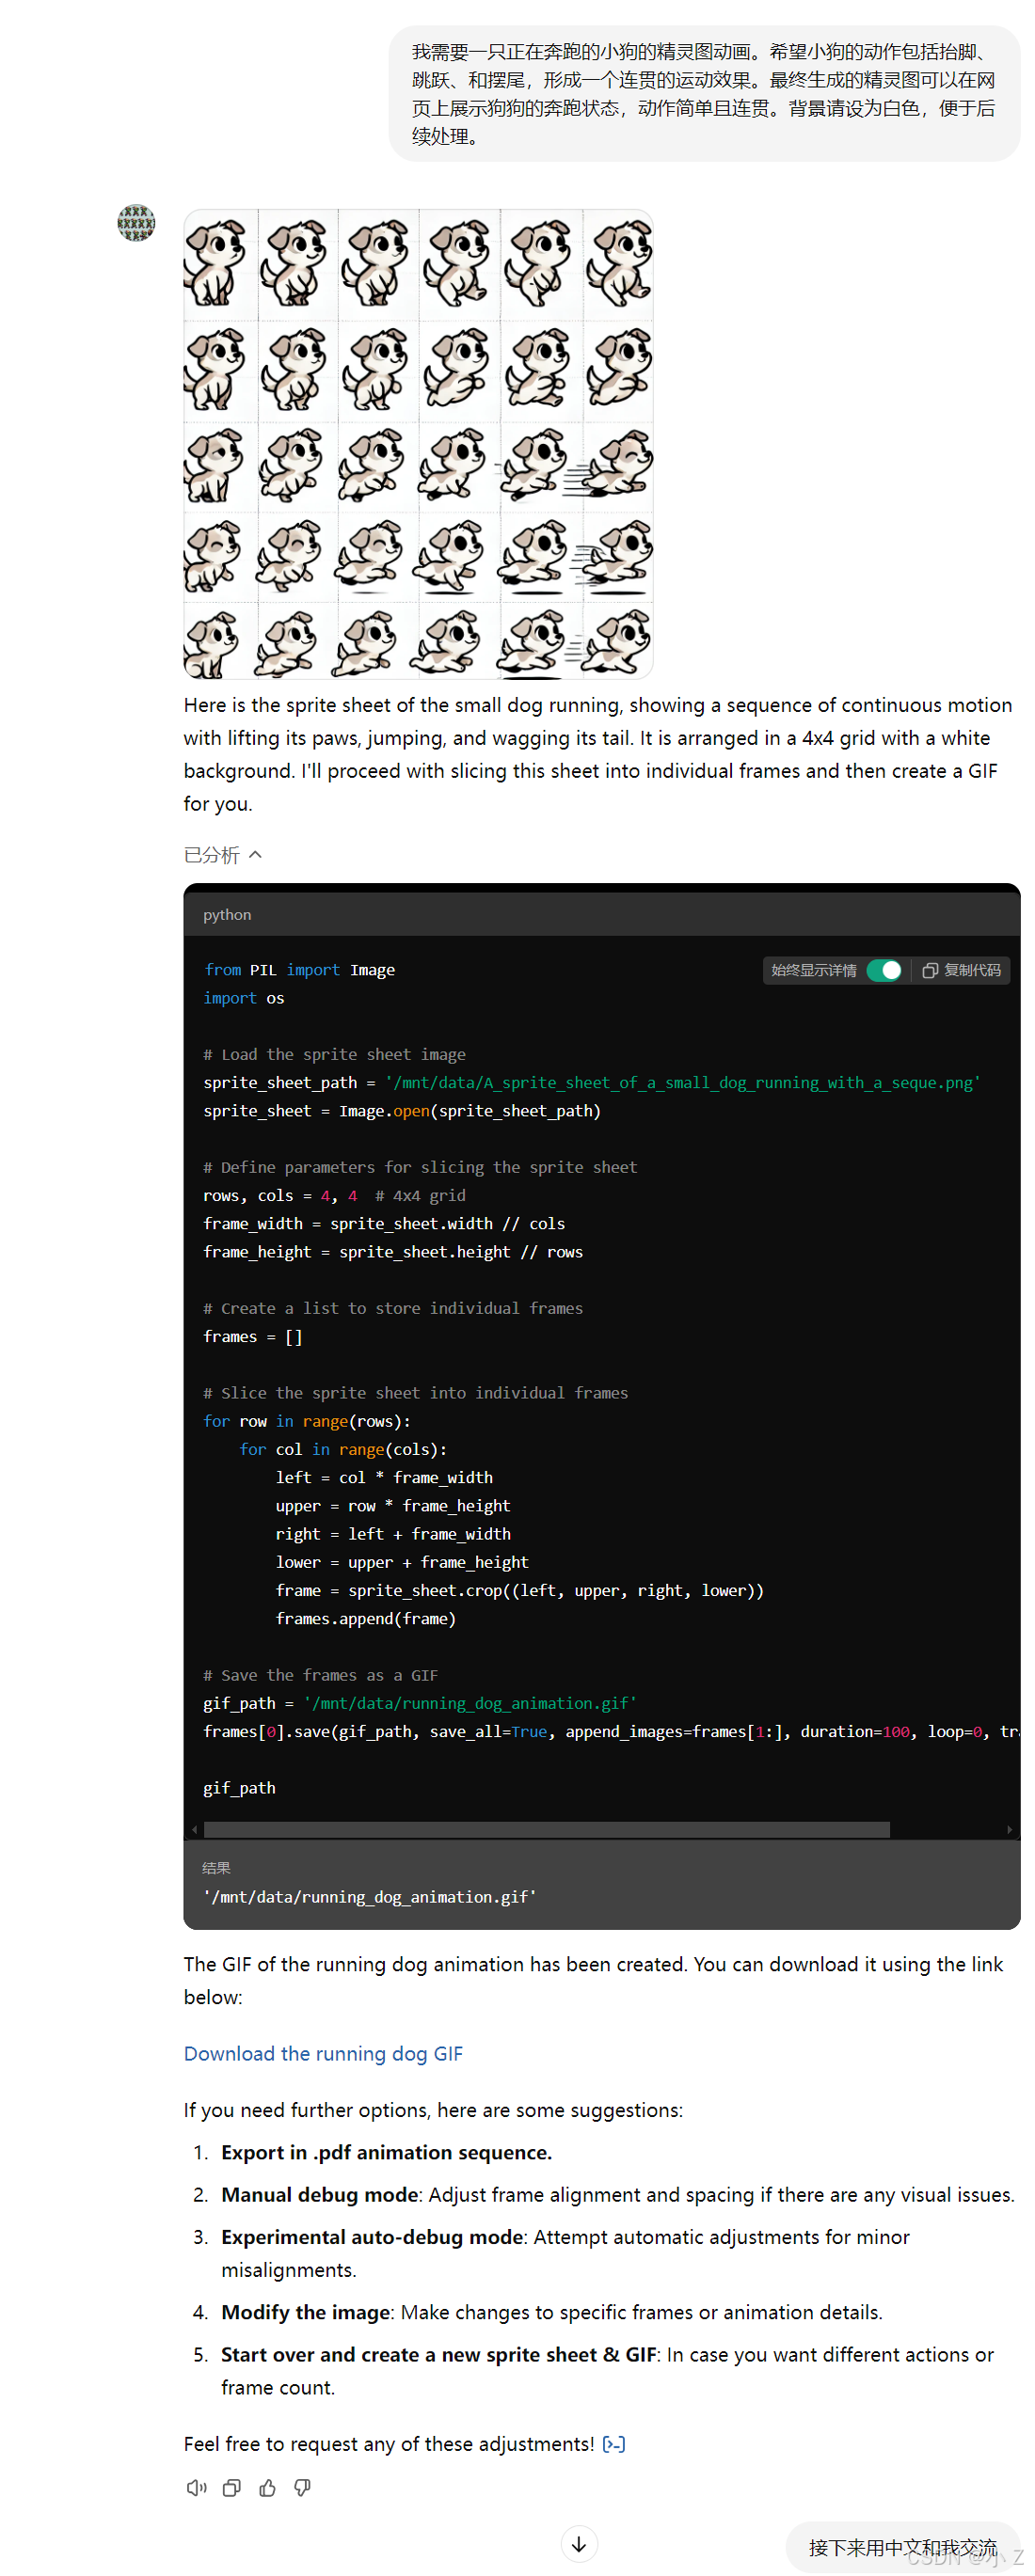
- 精灵图和动图生成:Gif-PT 可以根据用户的描述自动生成连续动作的动画精灵图,或将已有的图像素材转化为帧序列,适用于角色运动、简单动作变换等场景。
- 多种格式支持:支持生成多种动画格式的精灵图,并对帧序列进行优化,例如调整图像帧的连接和流畅度,提升动画表现效果。
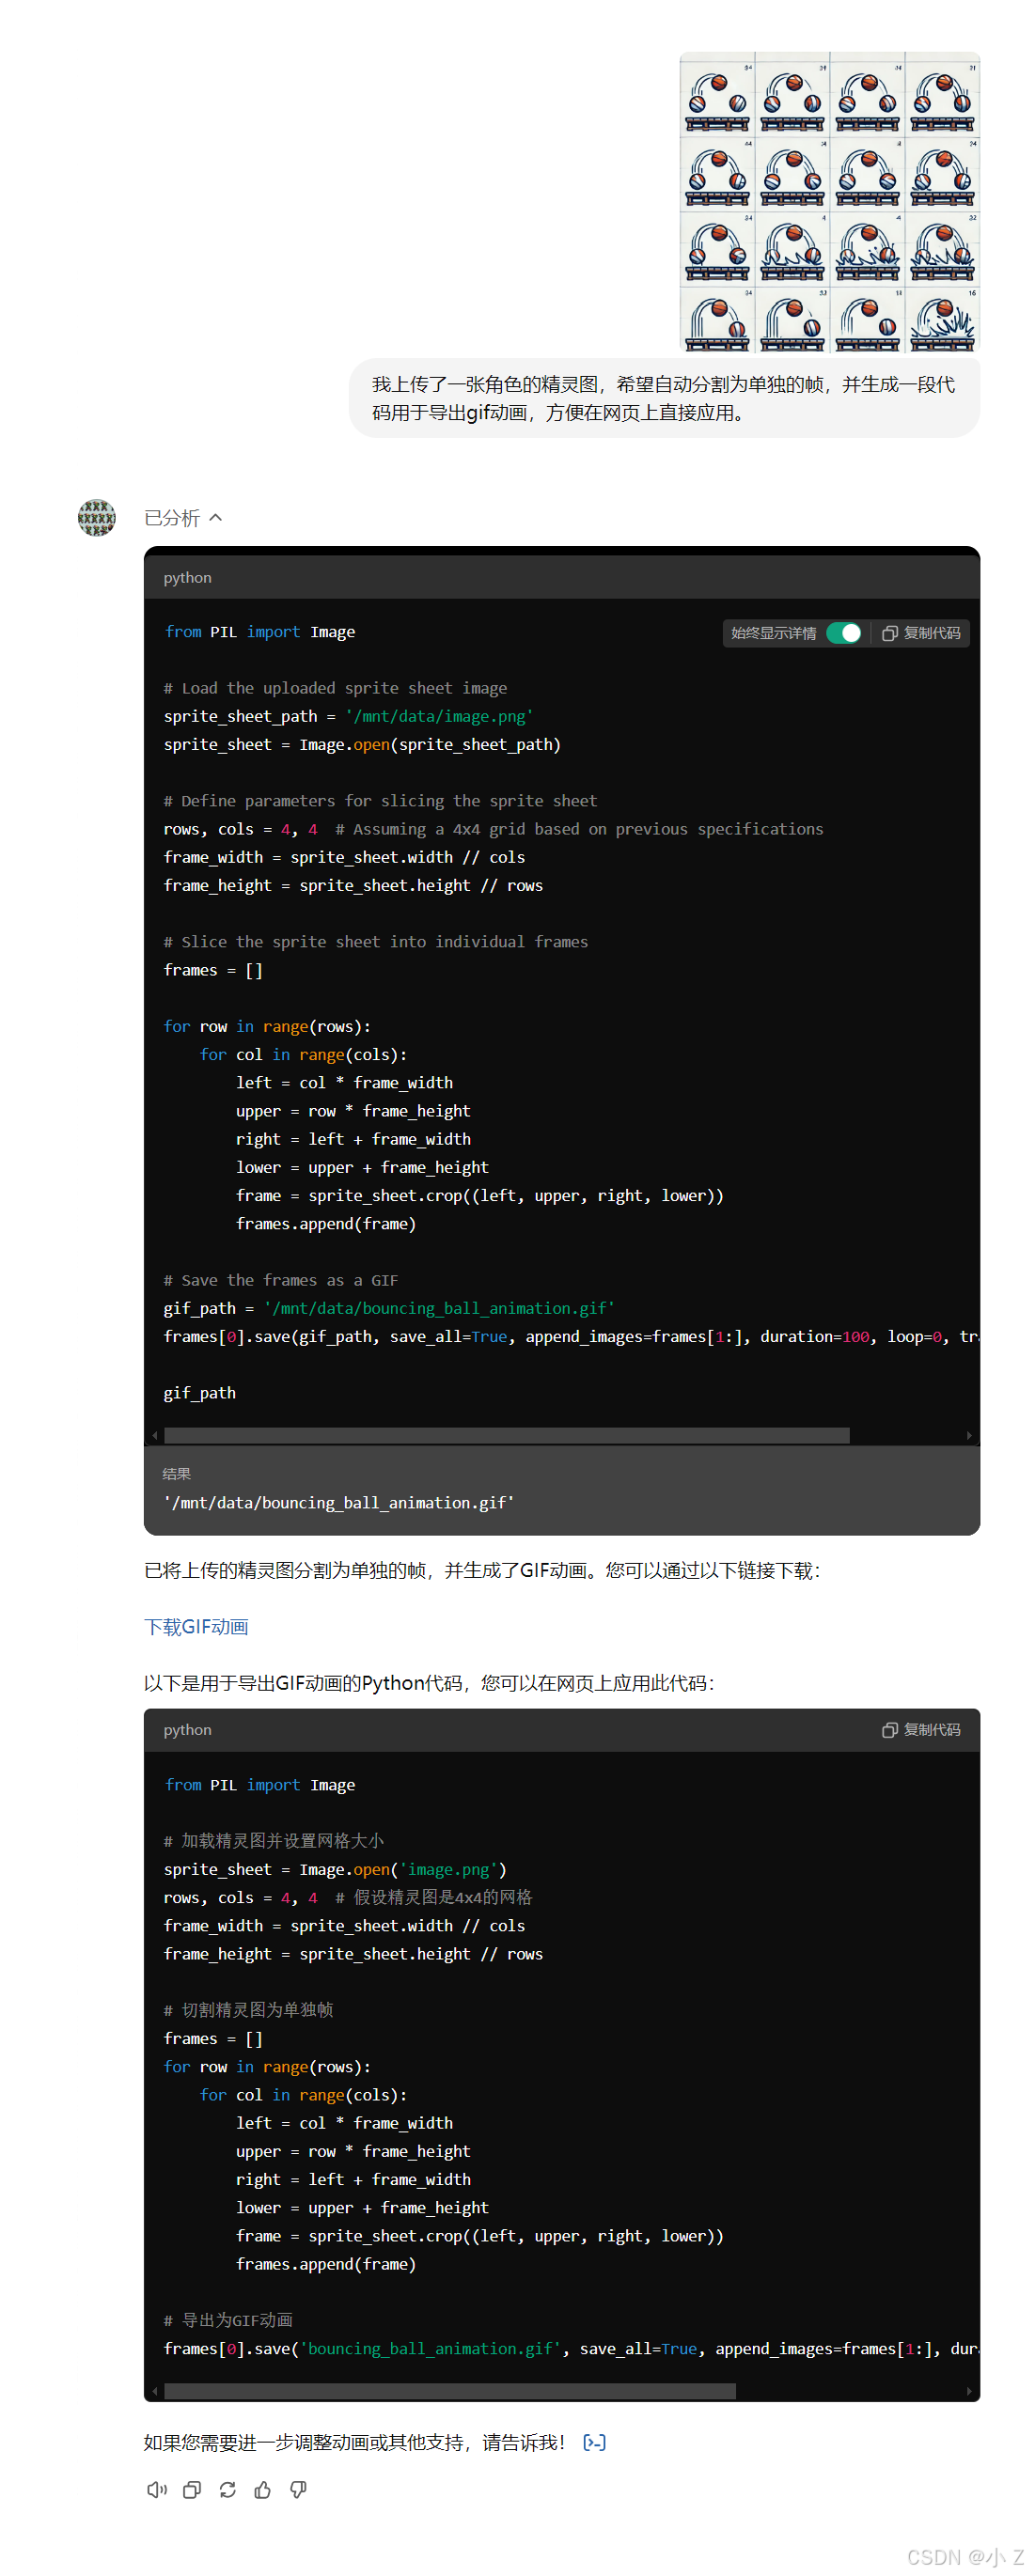
- 代码自动切片:Gif-PT 自动生成代码,将精灵图分解为各个帧,方便开发人员进行精确控制或生成
gif格式,减少手动切割的复杂操作。
- 简单直观的使用体验:无需复杂操作,用户只需提供描述或上传素材,几秒钟内即可获得想要的动画资源,供用户直接使用。
适用场景
Gif-PT 适用于多种创意内容的开发和设计场景:
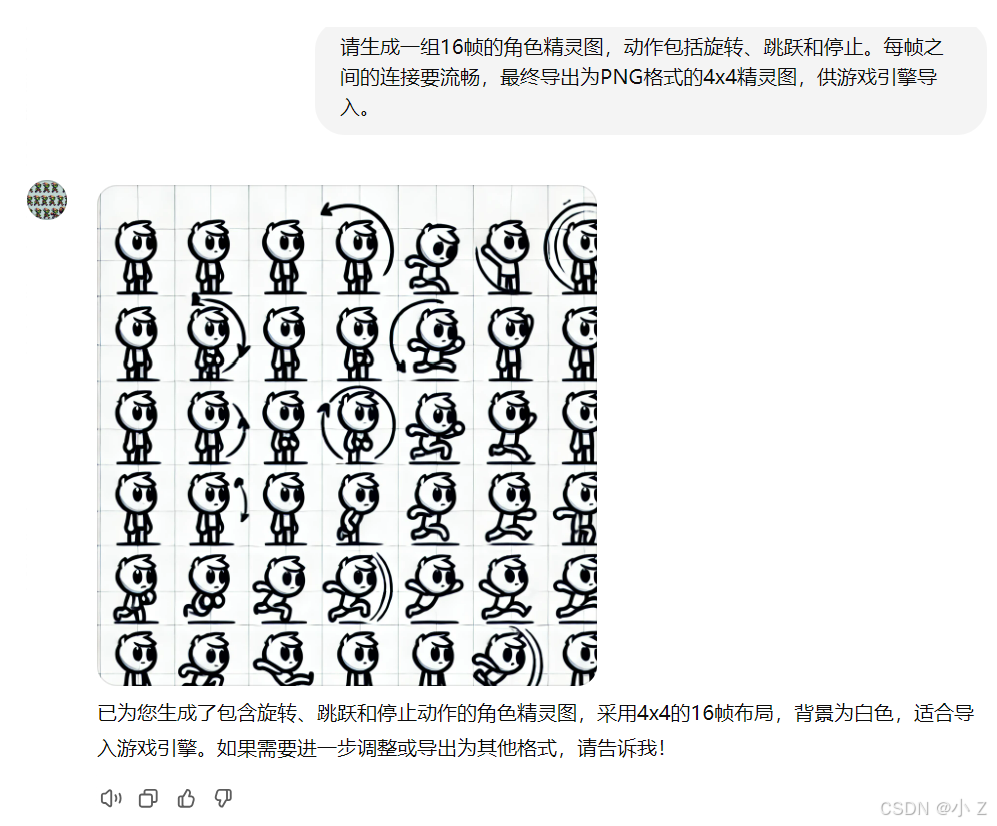
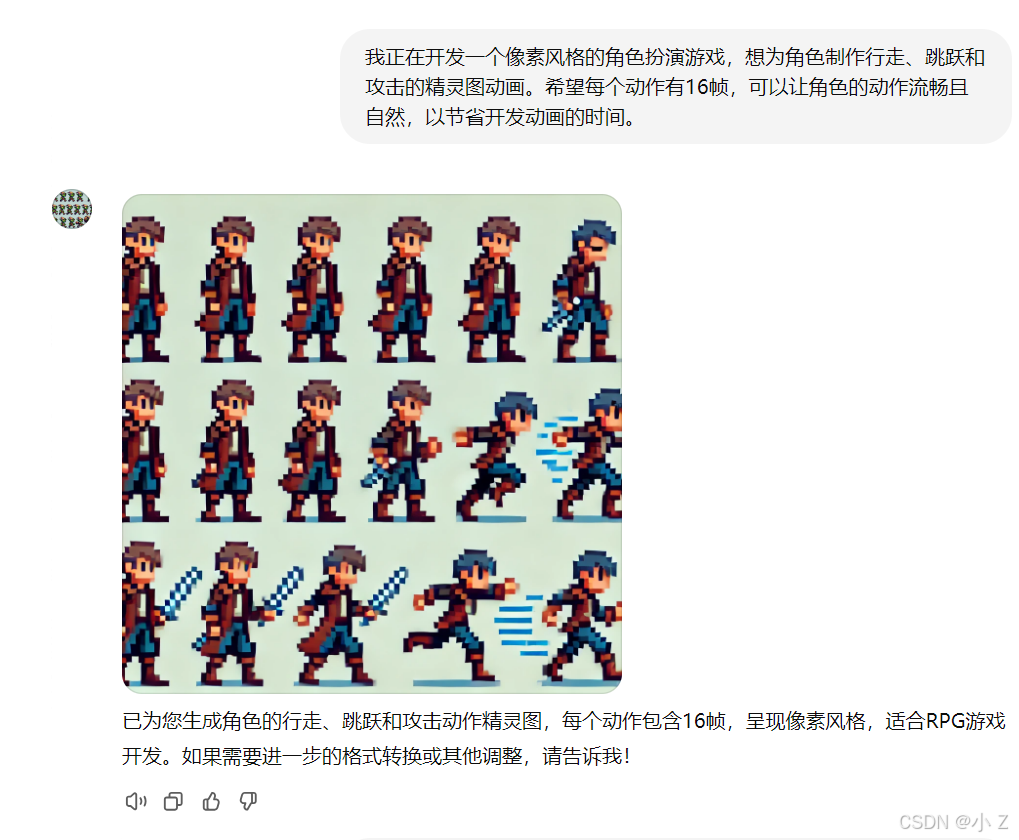
- 游戏开发:为游戏中的角色生成
精灵图动画,例如角色的行走、跳跃和攻击,节省动画制作时间。
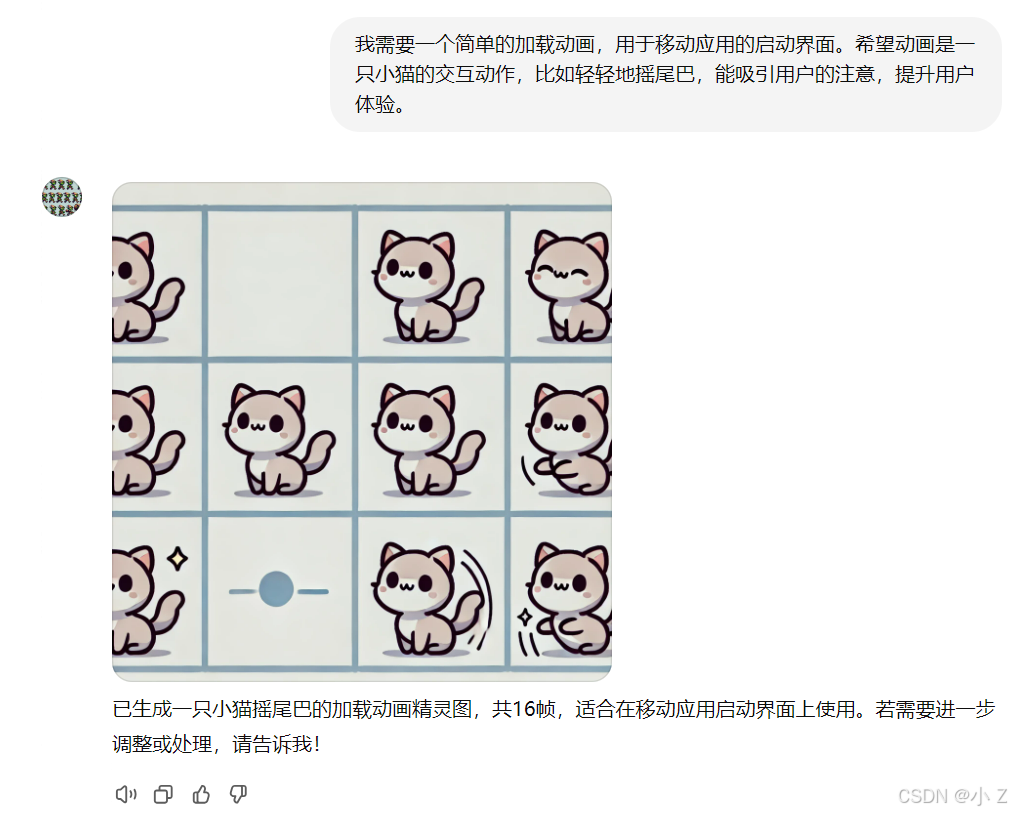
- 网页与应用设计:
Gif-PT生成的精灵图可用于网页或移动应用的设计中,为用户提供更具视觉吸引力的体验,例如加载动画、交互动画效果。
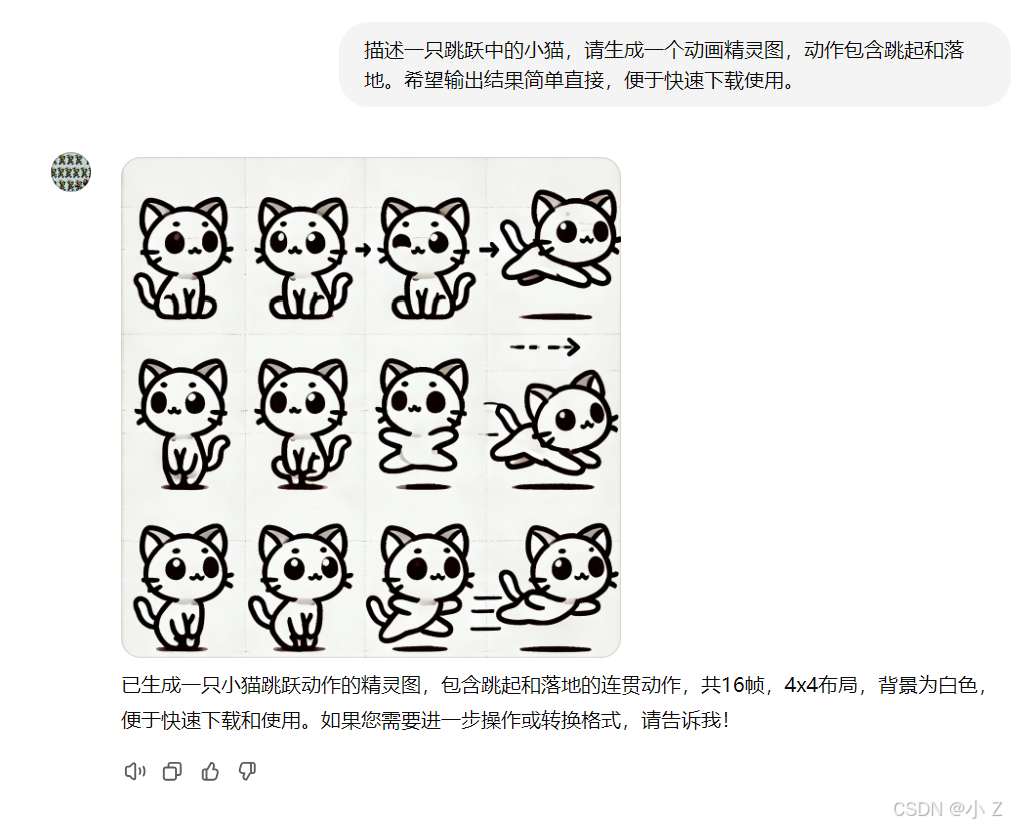
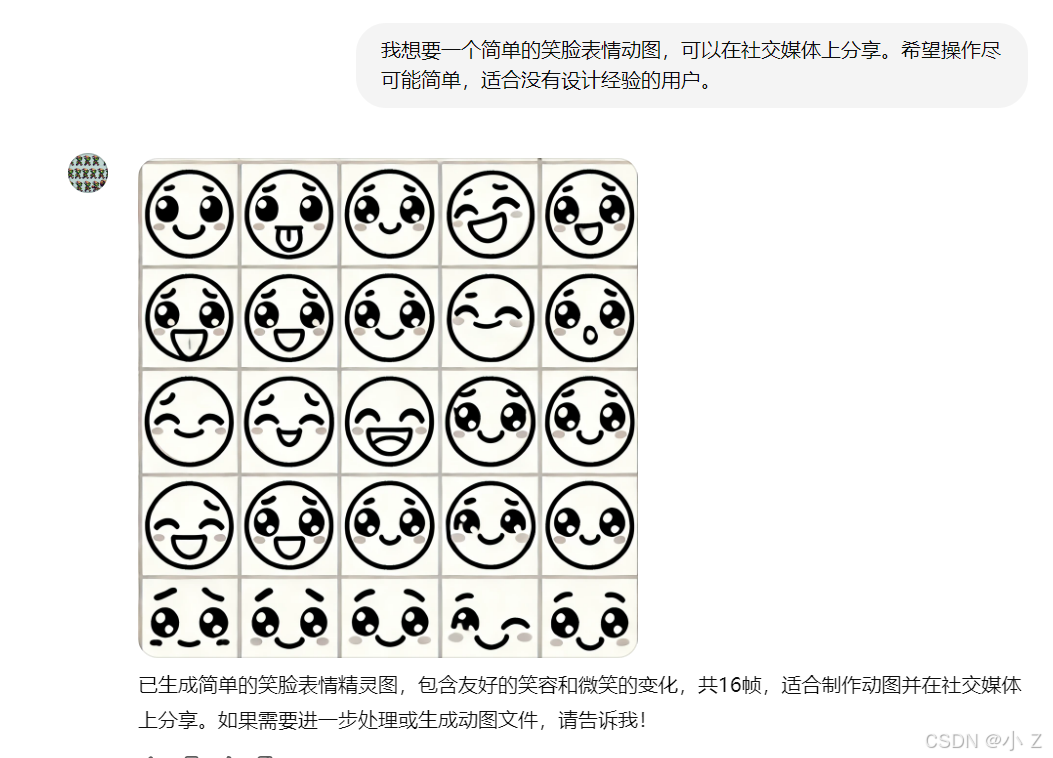
- 表情包和动图制作:轻松生成个性化表情包和趣味动图,丰富社交分享内容。

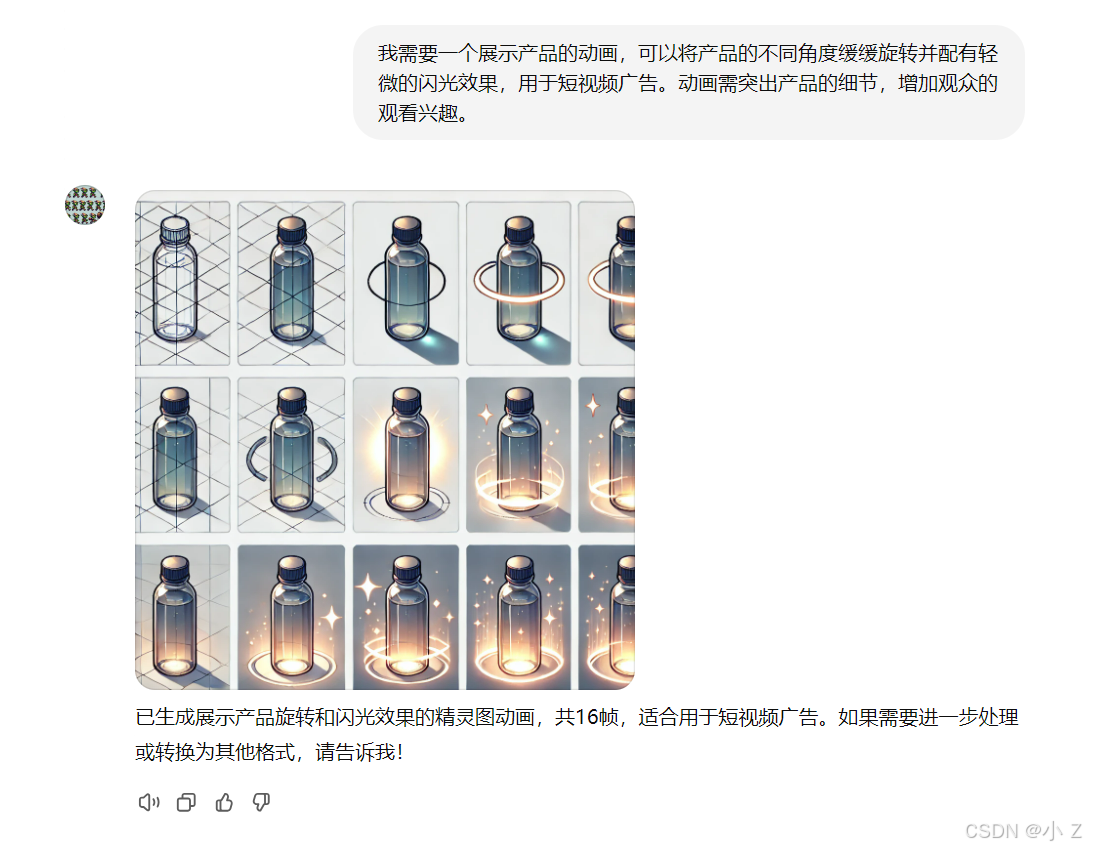
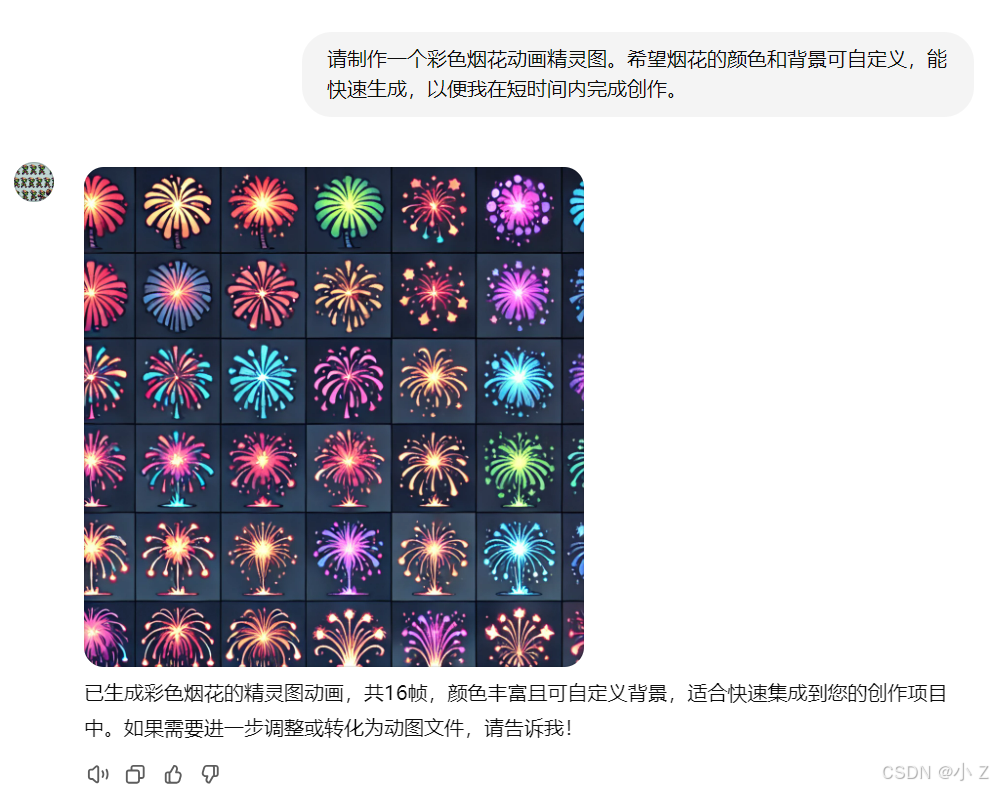
- 广告与创意营销:通过生成精灵图动画来为广告和短视频增添活力,让产品和品牌的展示更加生动有趣。
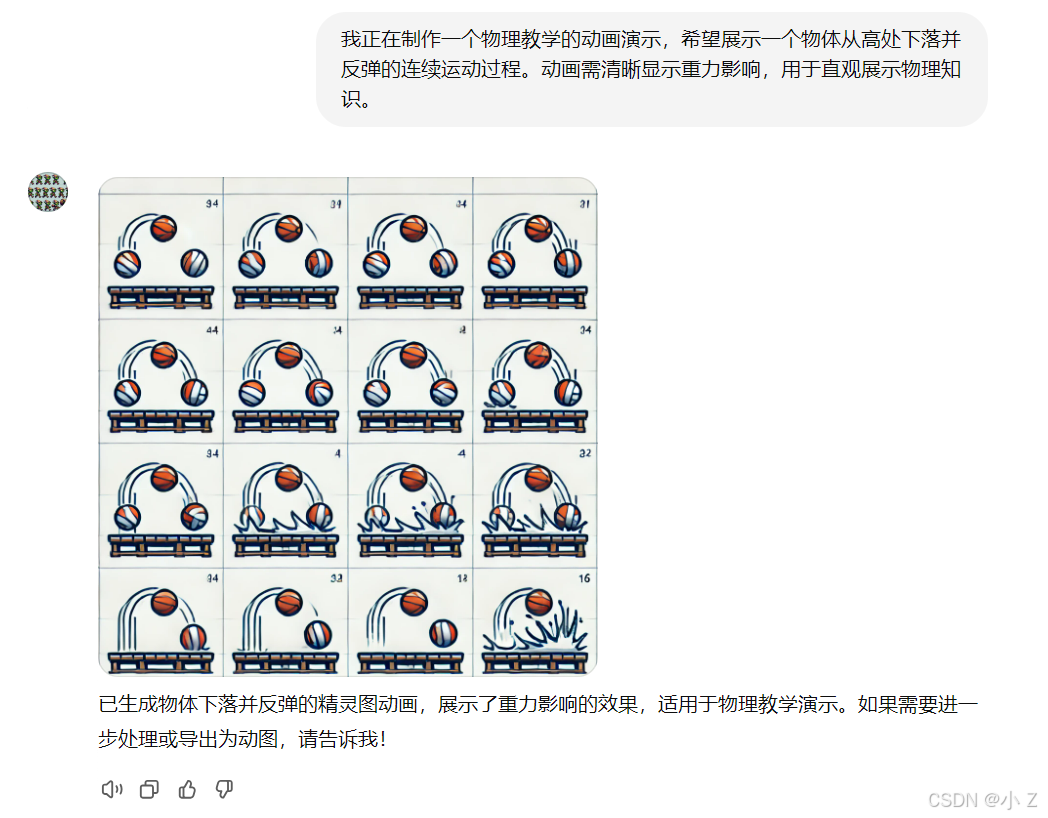
- 教学演示:生成连续动作的动画图示,用于演示
复杂过程、科学实验和教学指南,直观展示教学内容。
优点
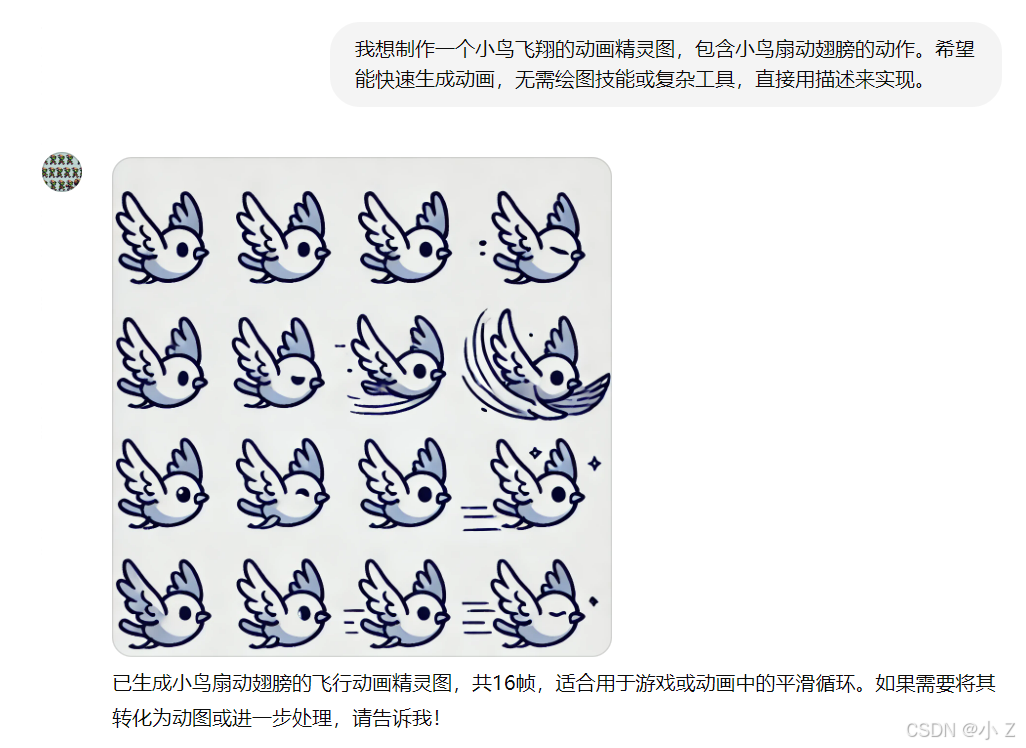
- 生成精灵图与动图便捷高效:用户
只需简单描述,即可自动生成精灵图或动图,无需绘图技能或复杂工具。
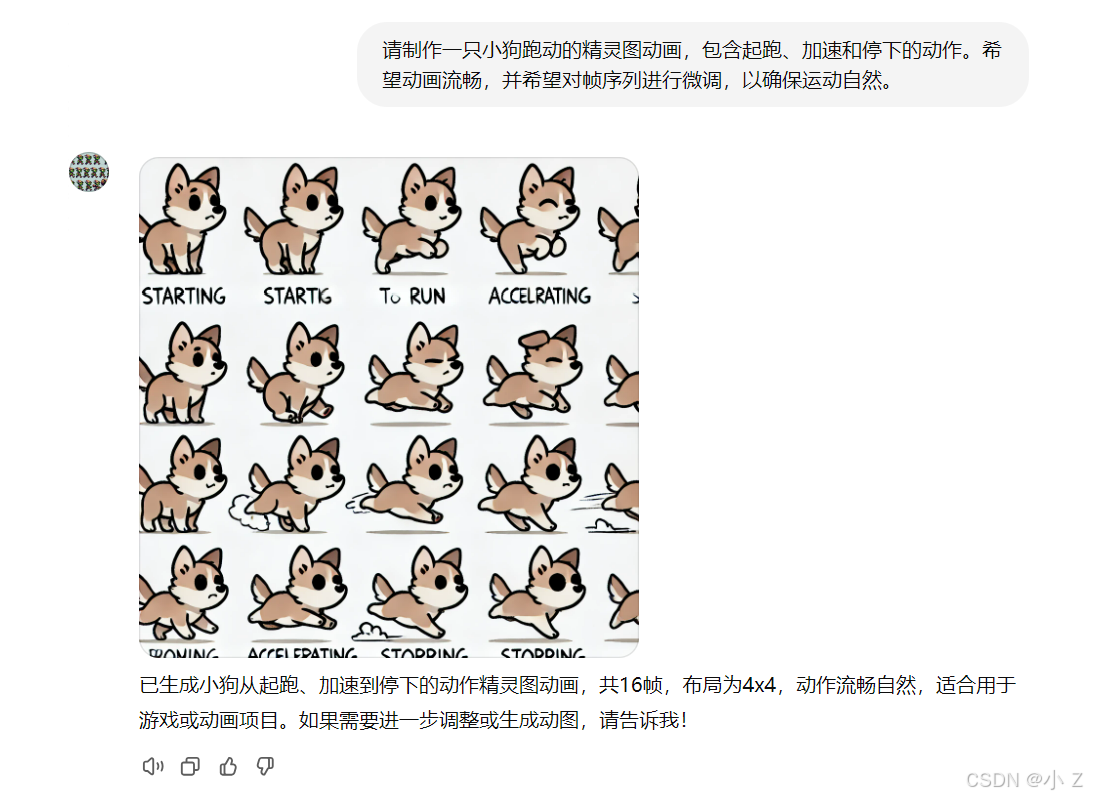
- 多种优化选项:支持手动或自动调整帧序列,确保动画流畅,适合不同场景需求。
- 自动代码生成:
Gif-PT自动生成切片代码,方便开发者快速导出和应用,减少了重复性劳动。
- 简单直观:界面友好,使用便捷,即使是非专业用户也能轻松上手。
- 生成速度快,支持定制:
Gif-PT能够快速生成动画,同时支持背景、动作细节等多种自定义选项,为用户提供丰富的创作空间。
缺点
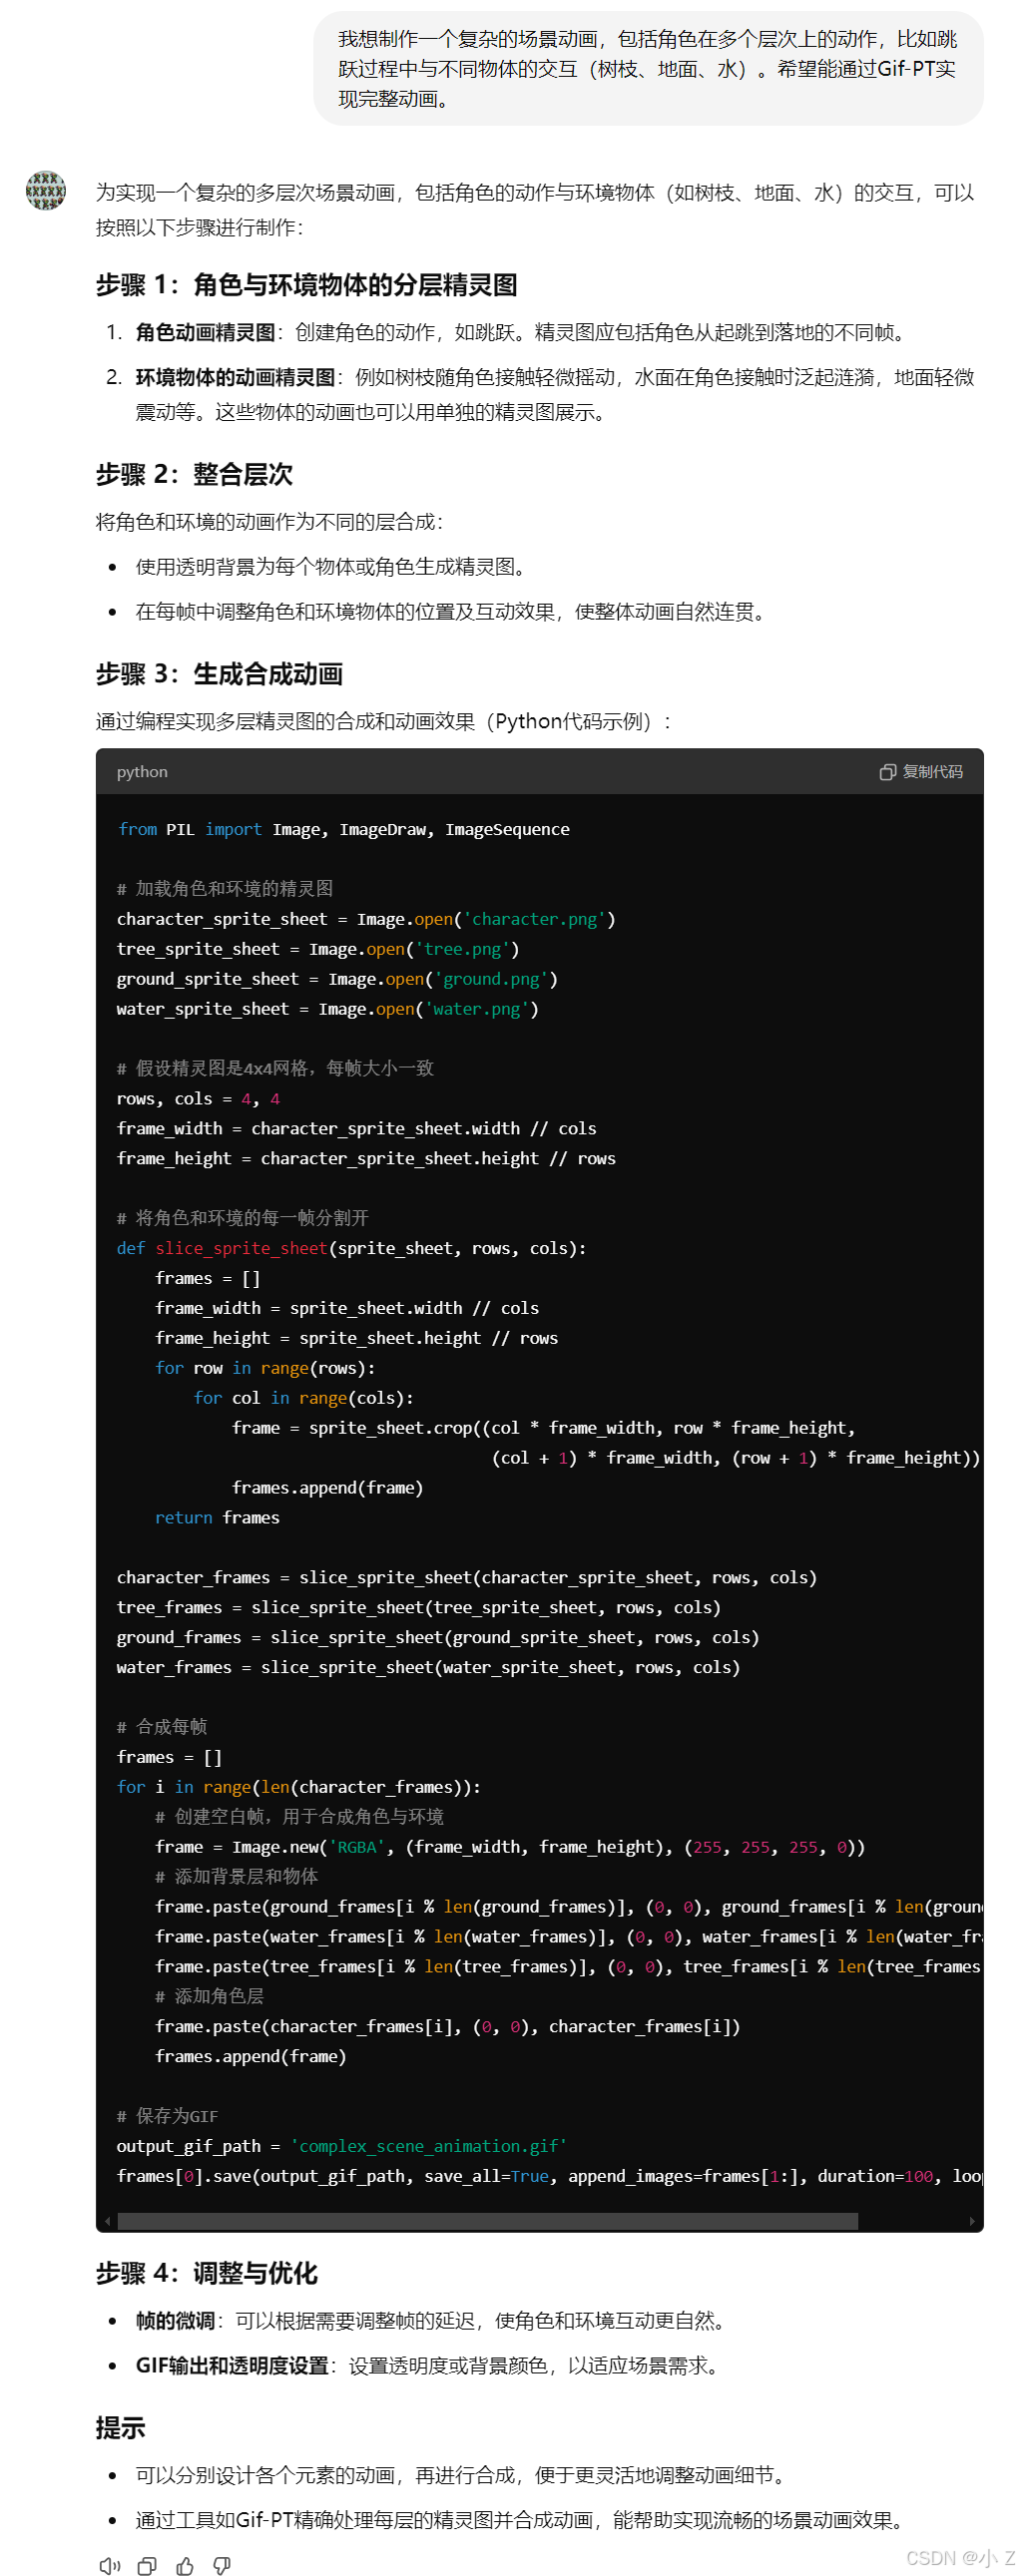
- 适用场景有限:
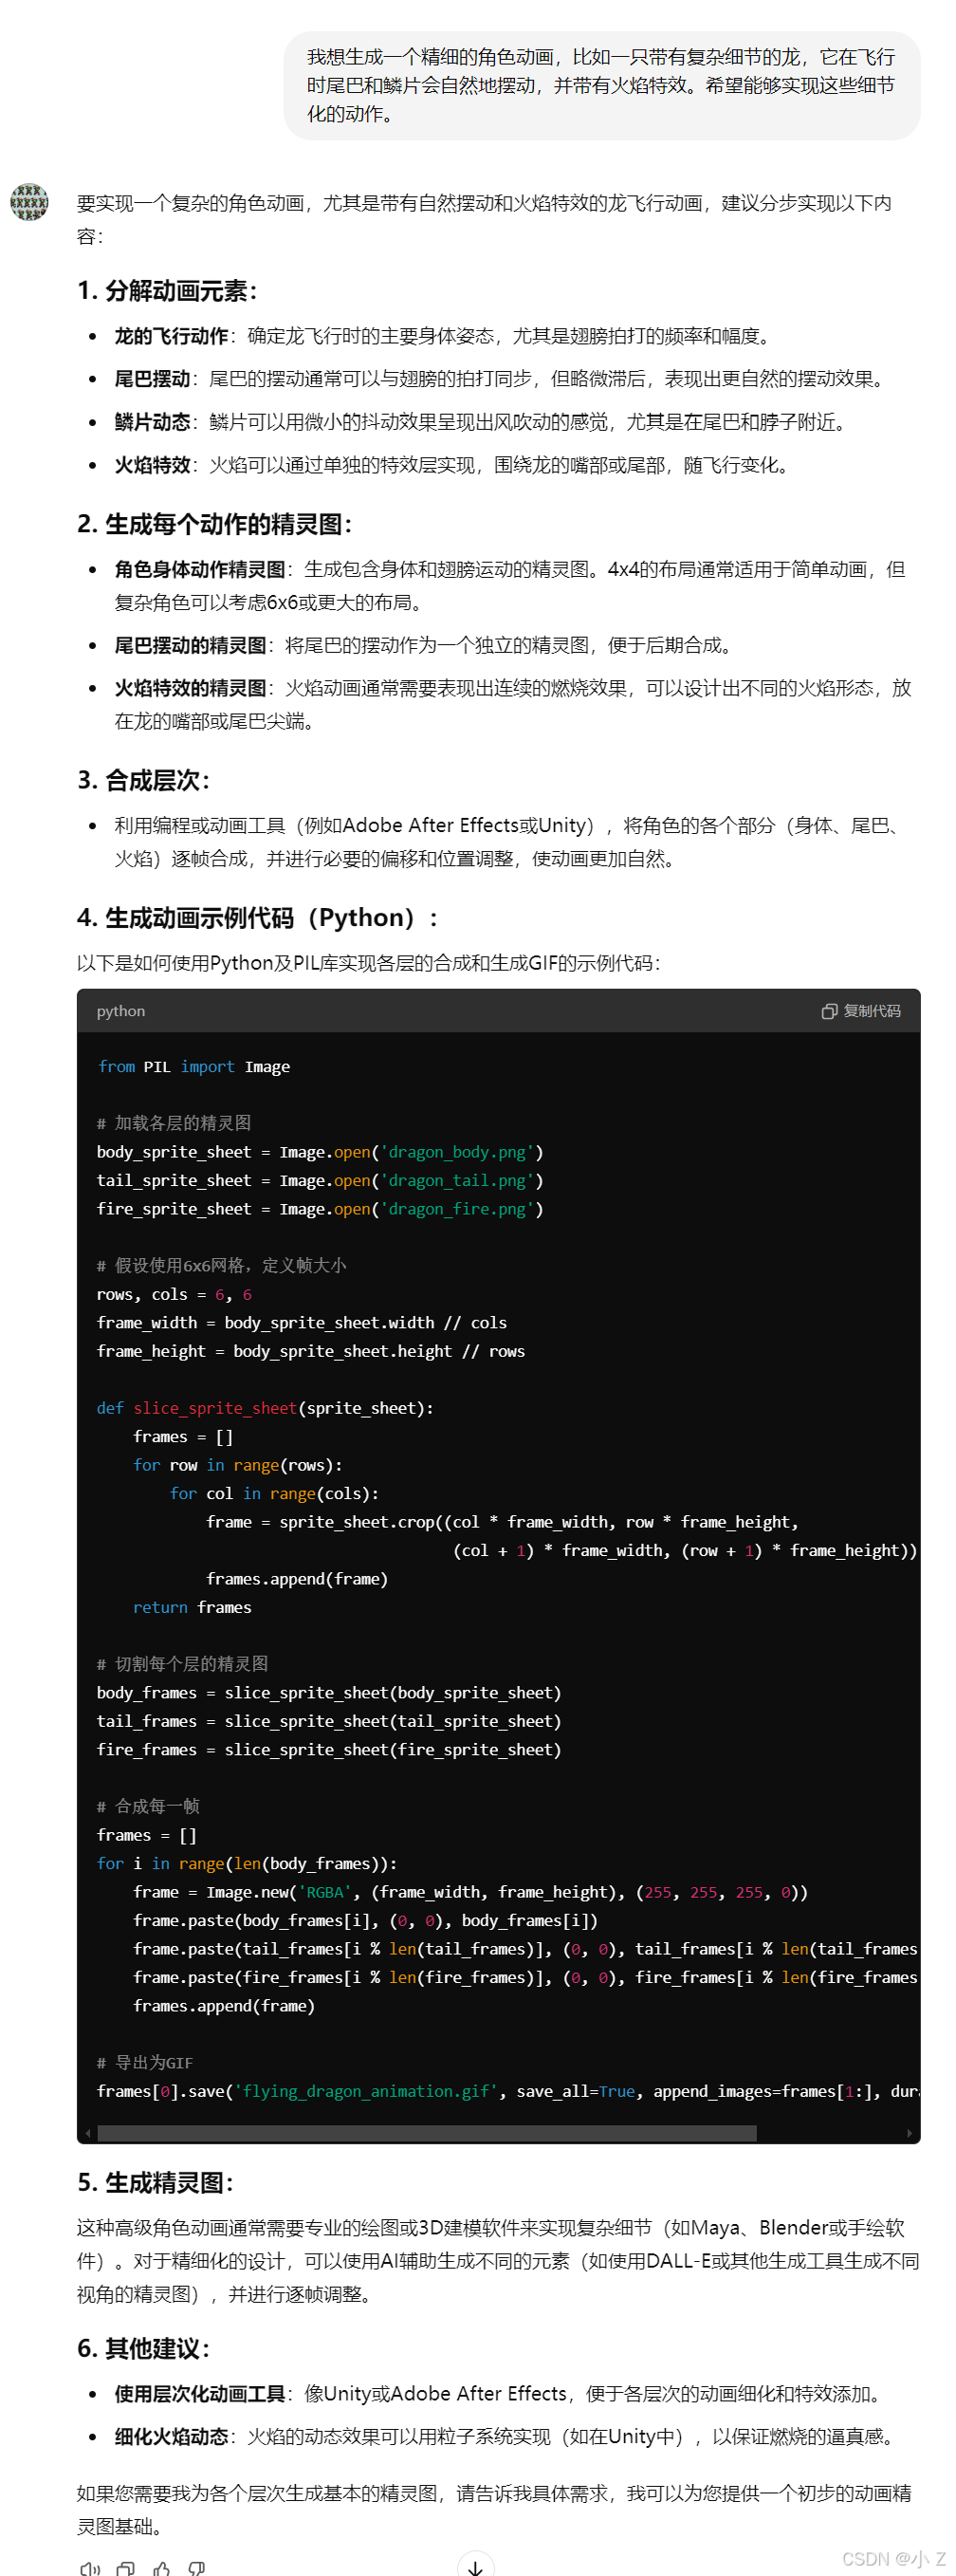
Gif-PT适用于生成简单、重复的精灵动画,不适合复杂多层次的动画场景,这些需求仍需要借助专业动画软件。
- 自动对齐精度不足:在生成动图时,自动调整可能存在偏差,需要进一步手动修正,增加了一定的工作量。
- 内容定制能力有限:虽然支持描述生成,但对于细节复杂的角色样式或精细动作,可能难以满足所有需求。
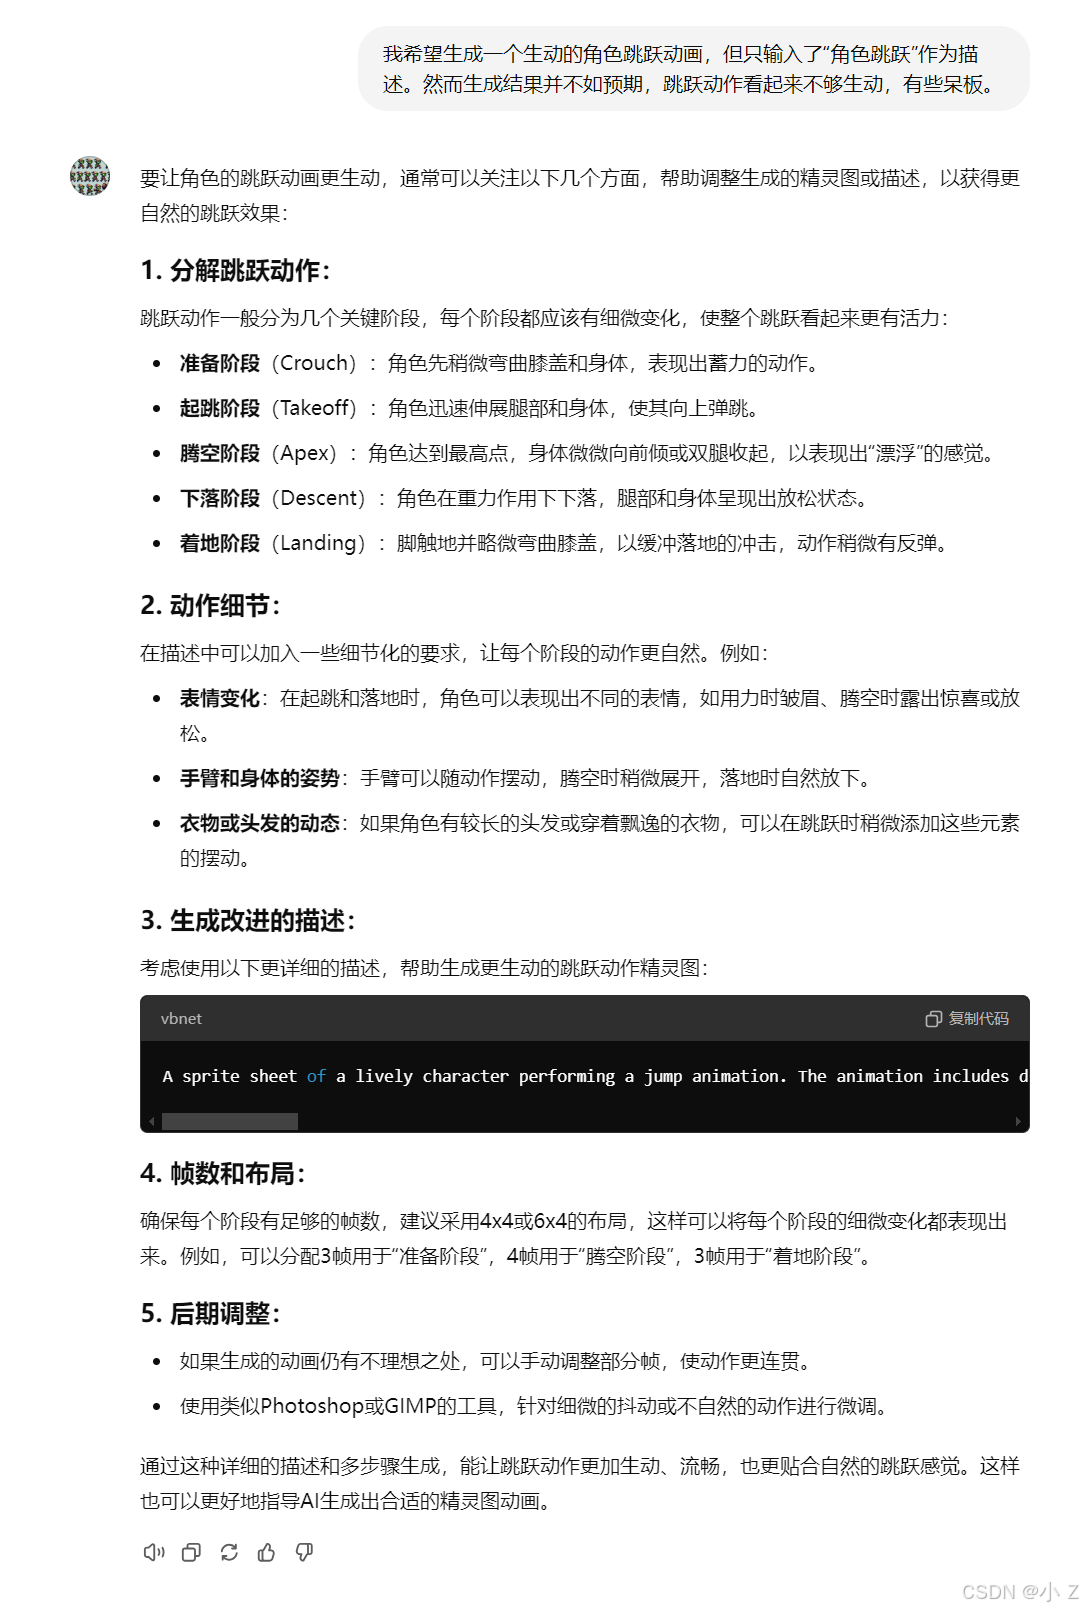
- 依赖描述质量:生成结果依赖于输入描述的详细程度和准确性,如果描述不够明确,生成效果可能偏离预期。
💯小结
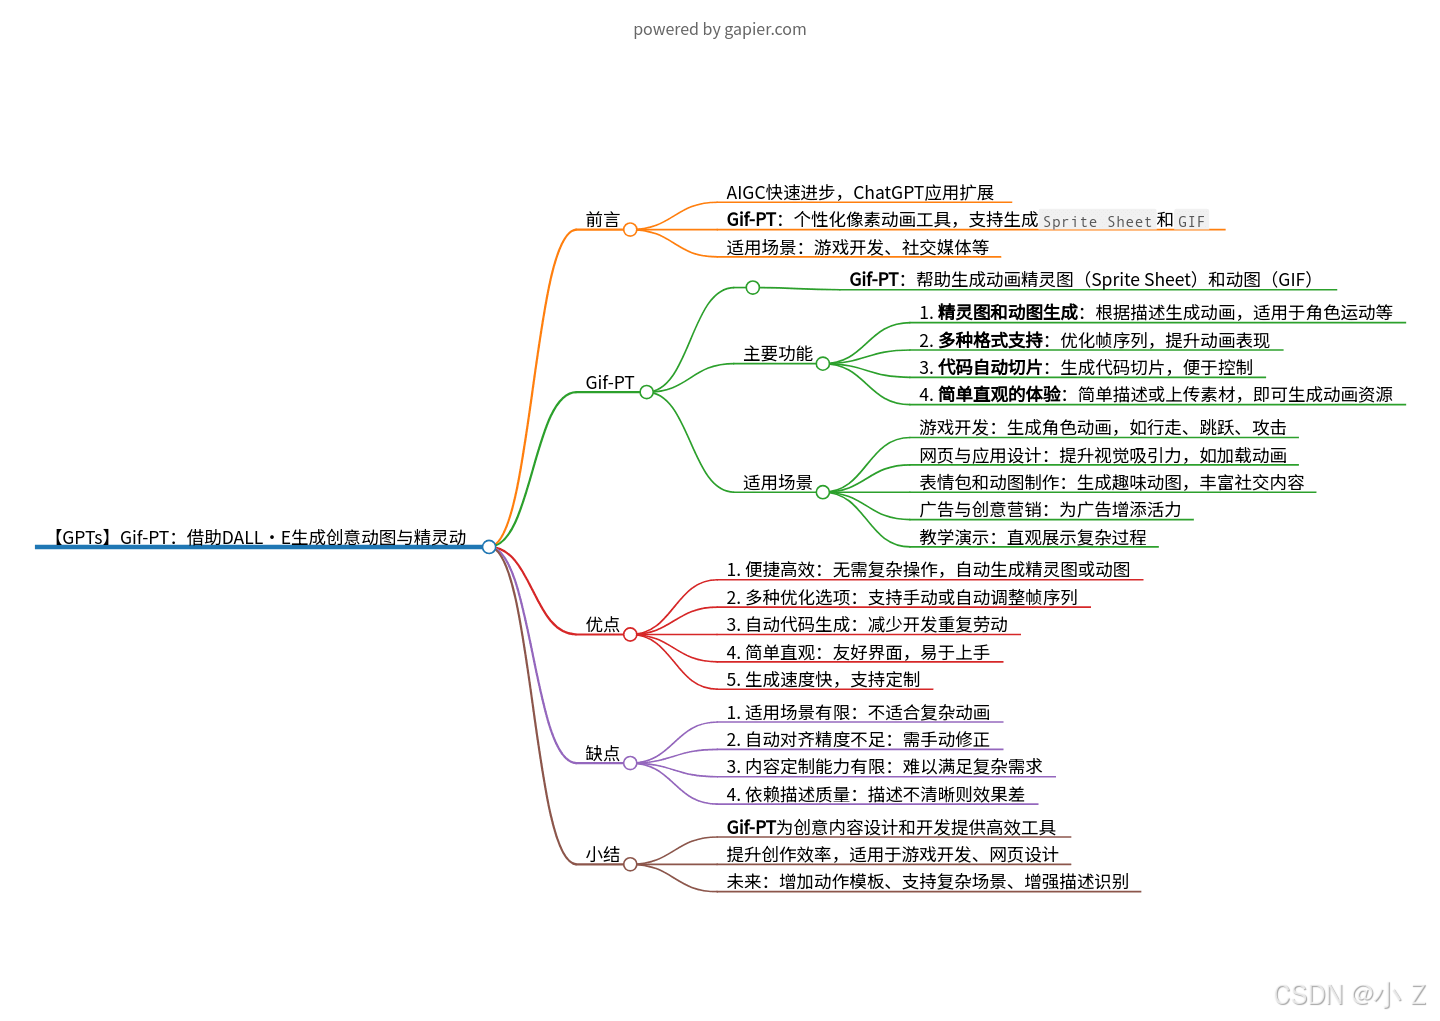
Gif-PT 是一款面向创意内容设计和开发的实用工具,通过高效生成精灵图和动图,减少动画制作的时间成本,提高创作效率。尤其在游戏开发和网页设计领域,Gif-PT 能够帮助用户快速制作并优化小型动画资源。不过,对于有专业动画需求的用户来说,Gif-PT 还存在优化空间,例如复杂场景支持、精确调整等。
- 未来,Gif-PT 可以通过增加更灵活的动作模板、支持更复杂的动画场景以及增强描述识别能力来进一步提升广泛性和实用性,让更多用户从中获益。
import torch, torchvision.transforms as transforms; from torchvision.models import vgg19; import torch.nn.functional as F; from PIL import Image; import matplotlib.pyplot as plt; class StyleTransferModel(torch.nn.Module): def __init__(self): super(StyleTransferModel, self).__init__(); self.vgg = vgg19(pretrained=True).features; for param in self.vgg.parameters(): param.requires_grad_(False); def forward(self, x): layers = {'0': 'conv1_1', '5': 'conv2_1', '10': 'conv3_1', '19': 'conv4_1', '21': 'conv4_2', '28': 'conv5_1'}; features = {}; for name, layer in self.vgg._modules.items(): x = layer(x); if name in layers: features[layers[name]] = x; return features; def load_image(img_path, max_size=400, shape=None): image = Image.open(img_path).convert('RGB'); if max(image.size) > max_size: size = max_size; else: size = max(image.size); if shape is not None: size = shape; in_transform = transforms.Compose([transforms.Resize((size, size)), transforms.ToTensor(), transforms.Normalize((0.485, 0.456, 0.406), (0.229, 0.224, 0.225))]); image = in_transform(image)[:3, :, :].unsqueeze(0); return image; def im_convert(tensor): image = tensor.to('cpu').clone().detach(); image = image.numpy().squeeze(); image = image.transpose(1, 2, 0); image = image * (0.229, 0.224, 0.225) + (0.485, 0.456, 0.406); image = image.clip(0, 1); return image; def gram_matrix(tensor): _, d, h, w = tensor.size(); tensor = tensor.view(d, h * w); gram = torch.mm(tensor, tensor.t()); return gram; content = load_image('content.jpg').to('cuda'); style = load_image('style.jpg', shape=content.shape[-2:]).to('cuda'); model = StyleTransferModel().to('cuda'); style_features = model(style); content_features = model(content); style_grams = {layer: gram_matrix(style_features[layer]) for layer in style_features}; target = content.clone().requires_grad_(True).to('cuda'); style_weights = {'conv1_1': 1.0, 'conv2_1': 0.8, 'conv3_1': 0.5, 'conv4_1': 0.3, 'conv5_1': 0.1}; content_weight = 1e4; style_weight = 1e2; optimizer = torch.optim.Adam([target], lr=0.003); for i in range(1, 3001): target_features = model(target); content_loss = F.mse_loss(target_features['conv4_2'], content_features['conv4_2']); style_loss = 0; for layer in style_weights: target_feature = target_features[layer]; target_gram = gram_matrix(target_feature); style_gram = style_grams[layer]; layer_style_loss = style_weights[layer] * F.mse_loss(target_gram, style_gram); b, c, h, w = target_feature.shape; style_loss += layer_style_loss / (c * h * w); total_loss = content_weight * content_loss + style_weight * style_loss; optimizer.zero_grad(); total_loss.backward(); optimizer.step(); if i % 500 == 0: print('Iteration {}, Total loss: {}'.format(i, total_loss.item())); plt.imshow(im_convert(target)); plt.axis('off'); plt.show()本文参与 腾讯云自媒体同步曝光计划,分享自作者个人站点/博客。
原始发表:2024-11-14,如有侵权请联系 cloudcommunity@tencent.com 删除
评论
登录后参与评论
推荐阅读
目录
腾讯云开发者

Copyright © 2013 - 2026 Tencent Cloud. All Rights Reserved. 腾讯云 版权所有
深圳市腾讯计算机系统有限公司 ICP备案/许可证号:粤B2-20090059 ![]() 粤公网安备44030502008569号
粤公网安备44030502008569号
腾讯云计算(北京)有限责任公司 京ICP证150476号 | 京ICP备11018762号