为爱编程:用 Python 自动化 PDF 签名,顺便秀一波技术

为爱编程:用 Python 自动化 PDF 签名,顺便秀一波技术

Michael阿明
发布于 2026-03-25 13:56:25
发布于 2026-03-25 13:56:25
文章目录
- 1. 背景
- 2. 技术选型与准备
- 3. 代码解析与润色
- 4. 使用示例与效果
- 5. 结语
1. 背景
今天突然收到了女朋友的求助信息:“亲爱的,我的 PDF 软件好像坏了,我需要在上面加个电子签名,你能帮我弄一下吗?”
看着这条消息,我瞬间从沙发上弹了起来——这可是展现编码和技术实力的绝佳机会啊!
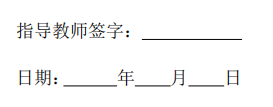
她需要的效果大概是这样的:在 PDF 的最后一页,右下角的位置,插入她的电子签名图片,并且在签名下方写上当天的日期。
在这里插入图片描述
2. 技术选型与准备
用个pdf编辑器不就完了吗?不行,不能放弃写代码的机会。
Python 作为万能胶,有很多处理 PDF 的库。这次我选择了 PyMuPDF(也叫 fitz),它功能强大,处理速度快,而且文档也比较友好。
首先,确保安装了必要的库:
pip install PyMuPDF Pillow
PyMuPDF (fitz): 用于读取、操作和保存 PDF 文件。Pillow: 用于处理图像文件,比如检查格式、调整大小、转换模式等。
3. 代码解析与润色
下面是经过润色和详细注释的完整脚本,我会逐段解释其功能。
#!/usr/bin/env python3
# -*- coding: utf-8 -*-

"""
PDF 电子签名工具

此脚本旨在自动化地将指定图像(如电子签名)插入到 PDF 文档的最后一页指定位置,
并可选择性地在图像下方添加当前日期。同时,脚本提供了 PDF 压缩功能,
以减小输出文件的体积。

作者:Michael阿明
日期:爱你的每一天
"""

import fitz  # PyMuPDF - 用于 PDF 操作的核心库
import io
from PIL import Image  # Pillow - 用于图像处理
import argparse  # 用于解析命令行参数
import sys
import os
from datetime import datetime  # 用于获取当前日期

# --- 辅助函数 ---

def is_pdf_file(file_path):
    """检查给定路径的文件是否为有效的 PDF 文件。
    通过读取文件头的前4个字节来判断。
    """
    try:
        with open(file_path, 'rb') as f:
            header = f.read(4)
            return header == b'%PDF' # PDF 文件通常以 %PDF 开头
    except Exception:
        return False

def is_image_file(file_path):
    """检查给定路径的文件是否为有效的图像文件。
    利用 Pillow 尝试打开文件,如果成功则认为是图像文件。
    """
    try:
        img = Image.open(file_path)
        img.close()
        return True
    except Exception:
        return False

def compress_pdf(input_path, output_path=None):
    """压缩 PDF 文件大小。
    使用 PyMuPDF 提供的多种压缩选项来减小文件体积。
    """
    if not is_pdf_file(input_path):
        print(f"错误: '{input_path}' 不是一个有效的PDF文件")
        return False

    if output_path is None:
        name, ext = os.path.splitext(input_path)
        output_path = f"{name}_compressed{ext}"

    try:
        doc = fitz.open(input_path)
        # 保存并压缩PDF
        # garbage=3: 最高级别的垃圾回收,清理未使用的对象
        # deflate=True: 启用 FLATE 压缩算法压缩文档流
        # clean=True: 清理文档,移除重复和无效的对象
        # deflate_images=True: 压缩嵌入的图像
        # deflate_fonts=True: 压缩嵌入的字体
        doc.save(output_path,
                 garbage=3,
                 deflate=True,
                 clean=True,
                 deflate_images=True,
                 deflate_fonts=True)
        doc.close()

        # 计算并显示压缩效果
        original_size = os.path.getsize(input_path)
        compressed_size = os.path.getsize(output_path)
        reduction = (1 - compressed_size / original_size) * 100
        print(f"PDF压缩完成:")
        print(f"  原始文件大小: {original_size:,} 字节")
        print(f"  压缩后大小: {compressed_size:,} 字节")
        print(f"  减少比例: {reduction:.1f}%")
        print(f"  输出文件: {output_path}")
        return True
    except Exception as e:
        print(f"压缩PDF时出现错误: {str(e)}")
        import traceback
        traceback.print_exc()
        return False

# --- 核心功能函数 ---

def insert_image_and_date_to_pdf(pdf_path, image_path, output_path=None,
                                offset_x=-50, offset_y=-50, width=100, height=100,
                                date_offset_x=0, date_offset_y=20, date_fontsize=12, date_format="yyyy年mm月dd日",
                                compress=False):
    """
    将图像插入到PDF的最后一页右下角,并在图像下方添加日期。

    参数:
    pdf_path (str): 输入PDF文件路径。
    image_path (str): 要插入的图像文件路径。
    output_path (str, optional): 输出PDF文件路径。默认为原文件名加'_output'。
    offset_x (float): 图像相对于页面右下角的水平偏移量(负值向左)。
    offset_y (float): 图像相对于页面右下角的垂直偏移量(负值向上)。
    width (float): 图像宽度。
    height (float): 图像高度。
    date_offset_x (float): 日期相对于图像左侧的水平偏移量。
    date_offset_y (float): 日期相对于图像底部的垂直偏移量(正值向下)。
    date_fontsize (float): 日期字体大小。
    date_format (str): 日期格式 (支持 yyyy, mm, dd 占位符)。
    compress (bool): 是否在保存时启用压缩。
    """
    # 1. 验证输入文件
    if not is_pdf_file(pdf_path):
        print(f"错误: '{pdf_path}' 不是一个有效的PDF文件")
        return False
    if not is_image_file(image_path):
        print(f"错误: '{image_path}' 不是一个有效的图像文件")
        return False

    # 2. 确定输出文件路径
    if output_path is None:
        name, ext = os.path.splitext(pdf_path)
        output_path = f"{name}_output{ext}"

    try:
        # 3. 打开 PDF 并定位到最后一页
        doc = fitz.open(pdf_path)
        page = doc[-1]  # 获取最后一页
        page_rect = page.rect  # 获取页面尺寸

        # 4. 计算图像插入位置(基于页面右下角和偏移量)
        x0 = page_rect.width + offset_x - width
        y0 = page_rect.height + offset_y - height
        x1 = x0 + width
        y1 = y0 + height
        rect = fitz.Rect(x0, y0, x1, y1) # 定义图像插入的矩形区域
        print(f"页面尺寸: {page_rect.width} x {page_rect.height}")
        print(f"图像位置: ({x0:.2f}, {y0:.2f}) 到 ({x1:.2f}, {y1:.2f})")

        # 5. 处理图像文件
        img = Image.open(image_path)
        # 如果图像是 RGBA 或 P 模式(带透明度或调色板),转换为 RGB 以避免插入问题
        if img.mode in ('RGBA', 'LA', 'P'):
            background = Image.new('RGB', img.size, (255, 255, 255)) # 创建白色背景
            if img.mode == 'P':
                img = img.convert('RGBA')
            # 将原图粘贴到白色背景上,处理透明度
            background.paste(img, mask=img.split()[-1] if img.mode in ('RGBA', 'LA') else None)
            img = background

        # 可选:优化图像大小以减小最终PDF体积
        max_size = (1000, 1000)
        if img.width > max_size[0] or img.height > max_size[1]:
            img.thumbnail(max_size, Image.Resampling.LANCZOS)
            print(f"图像已调整大小: {img.size}")

        # 6. 将 PIL 图像转换为 PyMuPDF 可用的格式并插入
        img_byte_arr = io.BytesIO()
        # 保存为 PNG 格式,并启用优化和高压缩级别
        img.save(img_byte_arr, format='PNG', optimize=True, compress_level=9)
        img_byte_arr.seek(0)
        pix = fitz.Pixmap(img_byte_arr.read())
        page.insert_image(rect, pixmap=pix, keep_proportion=True) # 插入图像,保持比例

        # 7. 插入日期文本
        now = datetime.now()
        year, month, day = now.year, now.month, now.day
        # 根据指定格式生成日期字符串
        date_str = date_format.replace("yyyy", str(year)).replace("mm", f"{month:02d}").replace("dd", f"{day:02d}")
        # 计算日期文本的插入位置
        date_x = x0 + date_offset_x
        date_y = y1 + date_offset_y # 注意:PDF 坐标系 y 轴向下为正
        # 插入黑色日期文本
        page.insert_text((date_x, date_y), date_str, fontsize=date_fontsize, color=(0, 0, 0))
        print(f"日期位置: ({date_x:.2f}, {date_y:.2f})")
        print(f"插入日期: {date_str}")

        # 8. 保存修改后的 PDF
        if compress:
            # 如果启用压缩,则使用压缩选项保存
            doc.save(output_path,
                     garbage=3,
                     deflate=True,
                     clean=True,
                     deflate_images=True,
                     deflate_fonts=True)
        else:
            doc.save(output_path) # 普通保存
        doc.close()

        print(f"成功将图像和日期插入到PDF的最后一页")
        print(f"输出文件: {output_path}")

        # 9. 如果启用了压缩,再次显示文件大小信息
        if compress:
            original_size = os.path.getsize(pdf_path)
            output_size = os.path.getsize(output_path)
            if output_size < original_size:
                reduction = (1 - output_size / original_size) * 100
                print(f"文件已压缩: 减少 {reduction:.1f}%")
        return True

    except Exception as e:
        print(f"处理过程中出现错误: {str(e)}")
        import traceback
        traceback.print_exc()
        return False

# --- 主程序入口 ---

def main():
    """主函数,负责解析命令行参数并调用相应功能。"""

    # --- 命令行参数解析 ---
    parser = argparse.ArgumentParser(
        description='将图像插入到PDF的最后一页右下角,并支持添加日期。\n'
                    '正确用法: python pdf_signature_tool.py pdf文件名 图像文件名 [选项]',
        formatter_class=argparse.RawDescriptionHelpFormatter # 保留描述中的换行
    )
    parser.add_argument('pdf_path', help='PDF文件路径')
    parser.add_argument('image_path', nargs='?', help='图像文件路径')
    parser.add_argument('-o', '--output', help='输出PDF文件路径')
    parser.add_argument('--offset-x', type=float, default=-50,
                        help='图像相对于右下角的水平偏移量(默认:-50,负值向左)')
    parser.add_argument('--offset-y', type=float, default=-50,
                        help='图像相对于右下角的垂直偏移量(默认:-50,负值向上)')
    parser.add_argument('--width', type=float, default=100, help='图像宽度(默认:100)')
    parser.add_argument('--height', type=float, default=100, help='图像高度(默认:100)')
    parser.add_argument('--date-offset-x', type=float, default=0,
                        help='日期相对于图像左侧的水平偏移量(默认:0,正值向右,负值向左)')
    parser.add_argument('--date-offset-y', type=float, default=20,
                        help='日期相对于图像底部的垂直偏移量(默认:20,正值向下)')
    parser.add_argument('--date-fontsize', type=float, default=12, help='日期字体大小(默认:12)')
    parser.add_argument('--date-format', default="yyyy年mm月dd日",
                        help='日期格式 (yyyy=年, mm=月, dd=日)(默认:yyyy年mm月dd日)')
    parser.add_argument('--compress', action='store_true',
                        help='启用PDF压缩')
    parser.add_argument('--compress-only', action='store_true',
                        help='仅压缩PDF文件,不插入图像')

    args = parser.parse_args()

    # --- 参数验证与流程控制 ---
    if not os.path.exists(args.pdf_path):
        print(f"错误: PDF文件 '{args.pdf_path}' 不存在")
        return 1

    if args.compress_only:
        # 如果只执行压缩操作
        return 0 if compress_pdf(args.pdf_path, args.output) else 1

    if not args.image_path:
        # 如果未提供图像路径,则报错
        parser.error("the following arguments are required: image_path")

    if not os.path.exists(args.image_path):
        print(f"错误: 图像文件 '{args.image_path}' 不存在")
        return 1

    # --- 执行核心功能 ---
    success = insert_image_and_date_to_pdf(
        args.pdf_path,
        args.image_path,
        args.output,
        args.offset_x,
        args.offset_y,
        args.width,
        args.height,
        args.date_offset_x,
        args.date_offset_y,
        args.date_fontsize,
        args.date_format,
        args.compress
    )
    return 0 if success else 1

if __name__ == "__main__":
    # 程序入口点,调用 main 并根据返回值退出
    sys.exit(main())
4. 使用示例与效果
女朋友发来的 PDF 和她的签名图片(sign.jpg)准备好后,我只需要在命令行里敲下一行指令:
python pdf_signature_tool.py './test.pdf' sign.jpg --compress --offset-x -60 --offset-y -350 --date-offset-x -50 --date-offset-y 10 --date-format "yyyy mm dd" --date-fontsize 16 -o test_with_custom_date.pdf
./test.pdf: 输入的 PDF 文件。sign.jpg: 要插入的签名图片。--compress: 启用压缩功能。--offset-x -60 --offset-y -350: 调整签名图片在页面右下角的位置。--date-offset-x -50 --date-offset-y 10: 调整日期相对于签名图片的位置。--date-format "yyyy mm dd": 自定义日期格式,增加了空格让日期看起来更舒服。--date-fontsize 16: 设置日期字体大小。-o test_with_custom_date.pdf: 指定输出文件名。
插入这张签名:

在这里插入图片描述
我们查看下效果:

在这里插入图片描述
在开发的过程中,考虑到文件不能太大,又加了压缩功能
原始文件有 5MB,压缩后只有 132KB,压缩率高达 97.4%!
这不仅满足了功能需求,还大大优化了文件体积,方便传输和存储。最终效果也完美符合女朋友的要求。
5. 结语
就这样,一个小小的 PDF 签名需求,通过 Python 脚本轻松搞定。这不仅仅是一个技术活儿,更是对女朋友的一份细心和体贴。
当她看到这个自动化工具和压缩后的轻量级文件时,脸上露出了满意的笑容。那一刻,我觉得所有的代码都是值得的。
所以,下次女朋友再遇到什么小麻烦,不妨试试用代码来解决吧,既能展现你的技术魅力,又能让她感受到你的用心和爱意!❤️
热烈欢迎各位关注我,一起加油!
本文参与 腾讯云自媒体同步曝光计划,分享自微信公众号。
原始发表:2025-07-27,如有侵权请联系 cloudcommunity@tencent.com 删除
评论
登录后参与评论
推荐阅读
目录
腾讯云开发者

Copyright © 2013 - 2026 Tencent Cloud. All Rights Reserved. 腾讯云 版权所有
深圳市腾讯计算机系统有限公司 ICP备案/许可证号:粤B2-20090059 ![]() 粤公网安备44030502008569号
粤公网安备44030502008569号
腾讯云计算(北京)有限责任公司 京ICP证150476号 | 京ICP备11018762号